
- Kathryn Sederberg, German Studies
- Rick Barth, Mathematics & Assistant Provost
- Christina Carroll, History
- Alyssa Maldonado-Estrada, Religion
- Elizabeth Manwell, Classics
- Santiago Salinas, Biology
- Brittany Liu, Psychology
Category: Uncategorized
A Team Meeting about Joining and Running Team Meetings – Alyce Brady, Josh Moon, and Rick Barth
Everything You Wanted to Know About Teams but Were Afraid to Ask!
This video features a meeting in which we discuss how to start or join a meeting in Microsoft Teams, how to participate through features such as raising a hand, muting and unmuting video or audio, or chatting on the side, how to share your screen, and how to record a meeting. We also talk a little bit managing meetings and how the Meet feature integrates with other Teams components.
Five Things: Indoor Air Quality in Classrooms at K
**August 20, 2020 Update** A more detailed version of this information has been published at the College Covid 19 Site.
I had a really informative meeting with Susan Lindemann, Director of Facilities Management, about the ventilation systems in our classroom buildings and steps being taken to prepare for on-campus classes this fall. The College is following the Covid19 guidelines of the American Society of Heating, Refrigerating and Air-Conditioning Engineers (ASHRAE), Here are five things I learned
- Fresh Air
- Windows — please leave them closed.
- Air handling is different than temperature/humidity control, but those are related
- Different classroom buildings have different needs
- Portable air purifier units
1. Dilution is the Solution to Pollution
The key idea is to dilute indoor air, and any infectious material in that air, with fresh air from outdoors. The air handling systems in classroom buildings at K have the capability to do exactly that with large outside air intake devices on each building. In fact, that was the case before Covid19 too. In the past, the mix of recirculated air and fresh outside air was achieved automatically by instruments that detect and maintain carbon dioxide levels in the building at healthy levels while improving energy efficiency by recycling some of the indoor air that has already been heated or cooled.
As we turn our attention to preventing possible spread of Covid19 by particles and aerosols in the indoor air, these systems are being reconfigured to increase the amount of outside air being brought indoors. This, together with the lower building occupancy associated with the College’s distancing and de-densifying plan, increases the effective dilution ventilation per person.
2. The Unintuitive Thing About Windows — Leave Them Closed.
In my house, the easiest way to dilute the inside air with fresh air from outside is to open a window. The situation in classroom buildings is different: The systems that detect and control the amount of fresh outside air in the building are tied directly to the outside air intake location in each building and not to any given room. Opening a window in one room disrupts the fresh air sensing equipment for the whole building, resulting in less fresh outside air being brought into the other rooms in the building.
3. What you feel in the air: Air Handling and Temperature Control are Different Things
The aspect of the building’s indoor environment we are most aware of is the temperature and humidity. The environmental control systems in the classroom buildings at K maintain a comfortable interior environment by two separate processes: air handling and hydronics.
Air handling is what we’ve been talking about in the points above. The hydronic system involves moving air past coils filled with heated or chilled liquid. That heating and chilling happens in the boiler/chiller plant at the bottom of Academy Street, with the hydronic liquid passing through underground pipes to the classroom buildings.
The air handling systems will be configured to bring more outside air into the mix to achieve greater dilution in each building, but of course we know that for most of the academic year in Kalamazoo, that outside air is cold! The amount of fresh outside air that can be included in the air handling mix will need to be balanced with the capacity of each building’s hydronic system to maintain a comfortable and safe temperature.
4. Different Buildings, Different Systems
What about my building? Here are some things to know:
- Dow Science building, because of its design for preventing airborne health hazards from chemistry and biology labs, has always included 100% fresh outside air in the air handling mix. There is no recirculation of interior air at all. The extra-high capacity hydronic system designed for that building maintains the indoor environment at comfortable temperature and humidity.
- Olds-Upton Hall has an air-handling system which is adequate for its traditional usage, as well as high dilution with greater proportion of fresh outside air discussed here. The hydronic system in OU is undersized for that purpose however. For that reason, it is possible that temperatures in OU will be less comfortable this year. To help maintain interior comfort, portable electrostatic air purifier units are planned for classroom spaces in OU, allowing for fresh air levels to be better balanced with the capacity of the hydronic system while at the same time actively reducing the concentration of any infectious material in the air.
- Dewing Hall is a tale of two zones. The air handling unit for the 3rd floor is not configurable to bring higher amounts of fresh outside air into the mix. For that reason, portable electrostatic air purifiers are planned for any classroom space in use on Dewing 3rd floor. The other levels of Dewing hall have a separate air handling system which allows for the greater dilution with outside air we’ve been discussing here.
- Light Fine Arts has generally adequate air handling capacity for including greater dilution of outside air. The special purpose uses of many spaces in LFA — for activities that traditionally bring large groups together in close contact while singing, acting, playing wind instruments, etc — bring with it special considerations.
- Upjohn Library Commons has generally adequate air handling capacity for including greater dilution of outside air. The need for special climate control in the rare book room brings extra considerations into play.
5. Portable Air Purifier Units
A lot of portable electrostatic air purifier units are on order now for use in classroom spaces in Dewing and OU, with deliveries scheduled to begin in the first few weeks of the term. As with other high-demand items — remember that every other higher education institution is making similar orders — the delivery dates are likely to change. These units are rated to handle large rooms from 1500 to 3000 square feet (1500 square feet is 30×50). We won’t know until they arrive how much sound they generate and the resulting impact on classroom acoustics.
Student Surveys in Moodle using the Feedback Activity
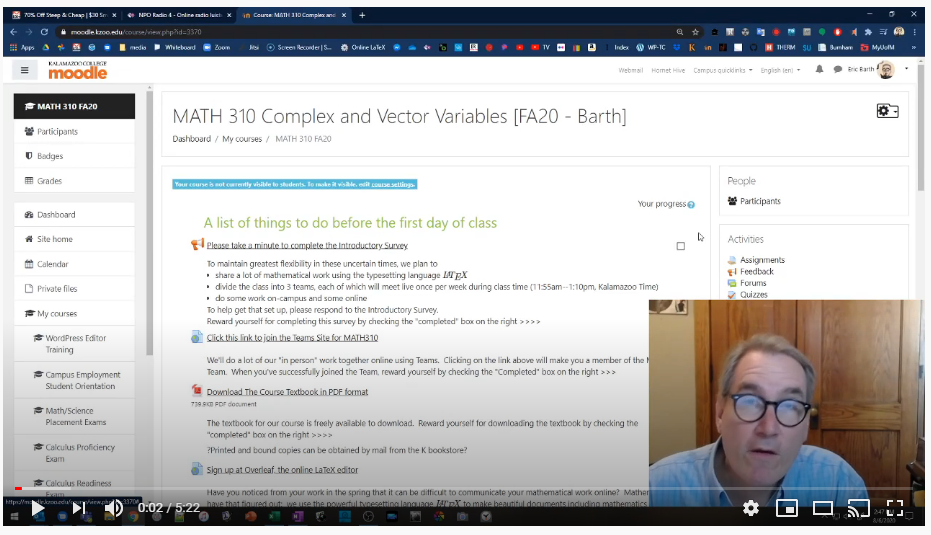
At the beginning of my course, I ask students to complete a survey to provide me with some information I need to make the course best fit their needs. Especially with online content, it is important for me to know about time zone differences, technology needs, and student preferences about what name to use when I address them and how to pronounce names.
Years ago, I just sent an email to my class and asked each student to reply. That left me with a lot of information to process. More recently I have used Google Forms and Microsoft Forms to easily make and distribute surveys and collect the responses. Now that Moodle is a part of everyone’s life at K, I’ve switched to the built-in survey feature on that platform. Here’s a five-minute video that shows everything you’ll need to make a survey using the Feedback activity in Moodle. This approach has the advantages that
- It is immediately visible to my students without the need to send a link by email
- it doesn’t require students to sign in at another platform
- it is available only to students in the class
- the data lives securely with all the other information at Moodle
- it has roughly the same rich features as the more famous solutions Google Forms and MS Forms
- you could reward students with some points in the Moodle grade book for completing the questionnaire!
Here’s the documentation page on the Feedback activity from docs.moodle.org
Some Example Questions for Student Surveys
Your Name * (you don’t need this if you use Moodle Feedback or MS Forms, but you will if you use Google Forms)
Name you would like me and the class to call you *
Pronouns you would like me and the class to use when referring to you *
What time zone will you be in during fall quarter? *
Will you be on-campus or online only?
Your major/minor/concentration and year
Why are you taking this class? What do you hope to learn from it? *
Do you anticipate any challenges using Moodle and Teams (such as lack of internet access, no computer, etc.)?
What device and what size screen will you be using to access Moodle and Teams?
Have you taken online courses in the past? What worked well for you in online courses?
Do you have any special needs or learning differences that you would like me to know about?
Is there anything you are especially concerned about as we work together digitally? (Your fears go here!)
Moodle FAQ
Wait, I thought we just rolled out Teams? Why I am using Moodle?
Teams is not designed to replace Moodle. Moodle and Teams can compliment one another. Moodle is an open-sourced, community-supported product that has decades of experience in traditional Learning Management System functions like receiving Assignments, distributing Files, and organizing a course. Though Microsoft has attempted to introduce some of those functions to Teams, we recommend focusing Teams use on their modern Chat interface, the videoconferencing functions, and other collaboration tools.
Where is my Moodle course? I don’t see it!
Visit https://moodle.kzoo.edu/login/index.php to access the login page. Enter your K ID and password. Once you are logged in, you can look at the Course Overview block on the Dashboard. Fall 2020 sites will be listed under “Future” until September 14th. At that time, they will also appear in My Courses on the menu on the left.
Okay, I found my Moodle. How do I begin setting this up?
Consider starting the the Four Models for Your Moodle Post on the Teaching Commons. What do you need your Moodle site to do? Do you need weekly sections or should you delete them? To learn how to use the site, you can watch a video introduction on Stream. If you’re inclined to read, there is also a Moodle 101 page with instructions. Would you like to talk to a human being? Contact Josh Moon, Educational Technology Specialist.
How do I get students enrolled in my Moodle site?
The simplest solution is to make sure you have set your Course Visibility to “Show” and then copy the Moodle course’s URL into an email to students (example: https://moodle.kzoo.edu/course/view.php?id=2638). Alternately, you can direct students to navigate to the appropriate departmental category under the active quarter Course Sites. In either case, they will need to login and click the “enroll me” button for the course.
How can I limit who can join my Moodle site?
Moodle does allow “Enrollment keys,” which are essentially passwords to protect course access. If one is especially concerned, you can prevent students from self-enrolling and manually add students from your course roster. For the latter option, click “Participants” in the menu then select “Enrollment Methods” in the gear wheel icon. By clicking the eye icon, you can disable Self Enrollment for students. You will then have to return to Enroll Users and manually search for students.
How do I open my Moodle site to students?
On your course’s main page, click the gear wheel in the upper right and select “Edit settings.” In the Settings option for Course Visibility, change the setting to “Show.”
What is the easiest way to get my files on there?
While you can use the File resource to manually add files with more control over settings, you can also turn your Editing On then drag-and-drop files from a folder on your computer. You can also go back and adjust settings to files already on Moodle.
How do I give feedback to students?
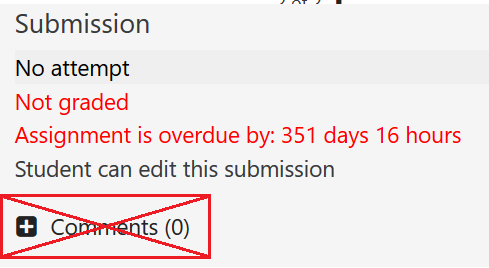
If you’re using the Assignment activity, you can choose multiple options for giving feedback. The most common are to enable Feedback Comments to give the grader a text window to add comments and Feedback Files which allows the grader to upload a file of their own for grading. Rubrics, a PDF editor, and other options exist. Note: this is not what the small “Comments…” (below) field is for.
I plan on delivering a lot of video content to students with Moodle. What is my best option?
Hosting large video files directly on Moodle causes problems for the system and are difficult to access for users. Fortunately, there are other options to get your video content on Moodle. If you need to host your video somewhere, you can upload it to Microsoft Stream or your own hosting solution. Moodle will allow you to link or embed these hosted files.
Helpful additional features in Moodle quizzes — Duong Nguyen
In this 6-minute video, I show a few features that I found helpful in Moodle quiz
- Adding random questions
- Repaginate
- Preview the quiz
- User Override
Leading with grace and reprioritizing with distance learning in a global pandemic — Brittany Liu & Kyla Day Fletcher
Too long, didn’t read: In this post, we reflect on some of the course design choices we made for our large, Psychology research methods course. A lot of things we’ll keep, some we’ll change. Knowing we couldn’t simply teach the course the same as previous iterations, we used these guiding principles and focused on 1) how to make the class accessible and inclusive to all students, 2) embracing flexibility, 3) following up with students quickly, and 4) extending compassion to ourselves and the students.
Some elements seemed to work really well, and were mentioned by students as particularly helpful while learning in a global pandemic.
- Accessible & flexible. We asked students to complete a survey before the first day of class. From the results, we saw that students’ home lives looked very different than when they were physically at K. Some were now working full-time jobs, some were working night shifts, some had to share a single computer with siblings also doing distance learning, some had childcare duties. We welcomed the students with a video addressing their concerns and anxieties, and shared our guiding principles for the course. Before covering content, we posted tips and resources not just for how to do their best work via distance learning, but also how to take care of themselves during a time of upheaval and uncertainty (e.g., link 1, link 2, link 3).
- Deadlines? We set due dates in the syllabus, but told students they were guideposts to keep them on track. There were not late deductions. When a student did not turn in assignments, we followed up with an email asking the student to check in with us (example of email wording). When a student reached out asking for an extension, we first wanted to respond to their emotional need, expressing our sympathy and understanding of the toll they’re under, reminding them that it’s good to take care of their well-being , and offering to follow-up one-on-one on assignments when they were ready.
- Synchronous contact: we put the students in groups and encouraged them to work with one another to study and practice the course content. Some groups took advantage of this, and others did not; next time, we will incorporate specific low-stakes activities to be completed by the groups to encourage socialization. We also were available for (optional) synchronous “office hours” twice a week (at staggered times for students with atypical schedules). We found that we tended to get the same handful of students each week and we really missed seeing students’ faces, chatting in live time with them. For the future, we plan to build-in more synchronous opportunities for Fall 2020 that are still flexible.
- We wanted to make sure that students could do their work whenever worked best for their schedule, so the course was asynchronous (recorded video lectures & slides posted to Moodle, and students turned in work via Moodle). We created short video lectures each week that lead to a short class assignment (goal for videos was 20 min, and in feedback students preferred this to when videos drifted closer to 40 min). We based assignments on in-class activities we used in the past. We also provided instructional videos for larger assignments to answer common questions and concerns. Other choices we made that aimed at giving students a better sense of control were 1) posting class materials on the same day of the week, so students knew when to expect them (you can set Moodle to do this ahead of time), 2) listing in the syllabus due dates for all assignments (big or small), and 3) using the syllabus to give students a color-coded suggested schedule for completing coursework.
- Quick follow-up with students. We wanted students to have something due every week so that we could monitor if a student stopped engaging with class (Moodle allows you to view which students have visited a page and/or opened a file). We provided answer keys for small assignments to provide immediate feedback and allow us to target our feedback more efficiently.
- Another big change was that in 2019 we had 2 big class projects; for 2020 we decided to break them down into medium assignments that still met our course learning outcomes. For instance, in 2019 students wrote a large literature review paper; for 2020 we broke it down into 5 medium assignments: a theoretical framework; article analysis; detailed outline of the paper; references page; and then formally writing-up 1 section of their outline. We really liked this change because we could get students feedback sooner on their big ideas, and hopefully students were more confident to start writing after getting feedback on their idea and outline.
Now, having time to pause and reflect, in some ways we are grateful for the opportunity to drastically rearrange our teaching priorities. We realize that many of the “necessary” components of past course iterations were in fact quite superfluous. By leading with compassion and reframing our approach, the students seem to have learned more, made more real-world connections, and achieved more psychological balance. Come to think of it…so did we.
Importing Question Banks for Moodle Quizzes — Duong Nguyen
The Moodle web interface allows easy categorization of the questions, but that method will take time if you want to create a big test bank since it requires multi-step navigation via on-screen buttons to write each question.
Here I’ll show straightforward ways to construct and import questions to Moodle and create a question bank.
Once you’re logged into the course page on Moodle, click on the gear symbol on the top right window, then choose More…
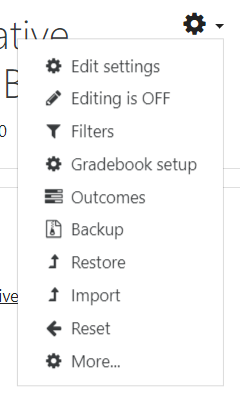
Scroll down to the bottom of the page and you’ll see Question Bank

If you’d like to create a new question in a particular category, you should choose the destination category from the drop down list before hitting Create a new question button. From here, there will be on-screen navigation to help you choose the question types and write the questions.
Importing questions in the Aiken Format
The Aiken Format works best for multiple choice questions. Many multiple multiple choice questions can be written in the same text file then imported to Moodle. For that reason, this method saves a lot of time because you don’t have to go through multiple steps to write an individual questions like in Moodle Web. An example of Aiken format is:
Question text
A. Choice 1
B. Choice 2
C. Choice 3
ANSWER: D
Some things to note:
- ‘ANSWER’ must be all capitalized, followed by : and a space. Otherwise, Moodle will give you an error during the import.
- .Each answer choice must start with a single uppercase letter, followed by a period (.) or parenthesis ), then a space.
- The file has to be saved as plain text (.txt)
- The Aiken format supports Latex Math symbols. You can use ∖( and ∖) or the double-dollars signs $$ $$ for Latex math mode. Commonly used math symbols in Moodle are detailed in Rick’s previous post.
- The Aiken format only supports multiple choice questions so if you want to add a variety of the question types (short answer, calculated, multi-parts quetions, etc. ), this format might not be for you.
- It seems that graphics or any kind of text formatting can only be added manually after the questions are imported to Moodle. In Windows, the built-in text editor NotePad provides the plain-text format. In macOS, the TextEdit program is found in the Utilities folder in Applications.
Once you have created a text file with questions in the Aiken format, select “import” from the Question Bank menu in moodle and navigate to the text file.
Creating question banks in Google Sheets
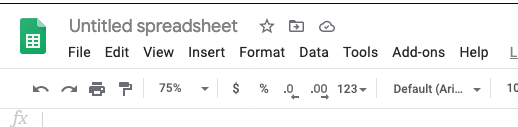
(QB)2 is a user-friendly add-on to help educators write and manage question bank directly in Google Sheets. It is also a great tool to bring your current question bank online.
You can install the needed extenstion to Google Sheets by selecting Add-ons and searching for (QB)2
After installing and activating the add-on in Google Sheets, you are ready to begin creating quiz questions. This 6-minute video shows you how.
More help on (QB)2 is available in this video from the package developer.
Connecting at a Distance — Bruce Mills
As the weeks progressed and things got increasingly difficult, I appreciate[d] Dr. Mills giving us the space to speak/write if we needed to and step away if we had to. I don[‘]t think this online transition was perfect, but I think Dr. Mills was consistently thinking about us as people and then as students, and I think that is why I got as much from this class as I did
Even though this class was also asynchronous, I felt a connection to the professor and my classmates that seemed to have been the product of these [weekly MS Team] discussions. It was something I looked forward to every week, because I always left that call feeling as though a weight had been lifted off of my shoulders. In times when (emotionally and physically) close contact is nearly extinct, being able to connect with others through serious and relevant texts (and also just have a safe space to discuss personal issues and beliefs) was relieving
I would like to pretend that every student left my spring courses with these same feelings. I am not so naïve. Still, I call them out as both an individual and communal affirmation. In departmental conversations (and across campus) with colleagues, I heard folks imagining and sharing humane and equitable practices —for students and ourselves. We centered on access (to readings and technology), on transparency, and thus on removing barriers that impede learning. Amid this crisis, I was reminded of an essential core to teaching: caring is content.
Let me also offer one final note before the resource link below. As a teacher, I see student motivation and learning as linked to feeling “named” or “seen.” It is about keeping an eye on connecting. Certainly, and this was no small task in the transition to online instruction, the strategies and technologies had to change for this connecting with students. However, the central arc of my pedagogy did not. This centering objective gave me confidence in choosing to select fewer chapters from Audre Lorde’s Sister Outsider and, in the case of Ralph Ellison’s Invisible Man, to read only the Prologue, Chapter One, and the Epilogue. It also led me to check in frequently with students and, out of these conversations, standardize days/times for weekly information emails, for weekly Moodle postings, and for group discussions (4-6 people) on Teams.
Alongside this effort to provide a reliable schedule, I instituted a philosophy and practice of reasonable flexibility. The linked article in The Chronicle of Higher Education (“5 Ways to Connect with Online Students”) offers a useful summary of things that mirror my own efforts during the spring.
Note: these suggestions point to additional workload in some areas and, as a result, the need to spend less time in others.
Bruce Mills
Department of English
You need to be using screenshots — Rick Barth
In my communication workflow in this crazy online era, I have realized that I can often avoid a wordy description with a picture:
- A formula or figure from some online source
- A little piece of the student’s online submitted work I’d like to comment on specifically
- A funny meme 🙂
I can make that happen with a screenshot. Often I just need to paste the result into a Teams chat (sorry, Zoom doesn’t allow that), an email, or a PowerPoint slide. I can also save the screenshot to an image file to use later. The process is easy for both macOS and Windows10.
Windows10
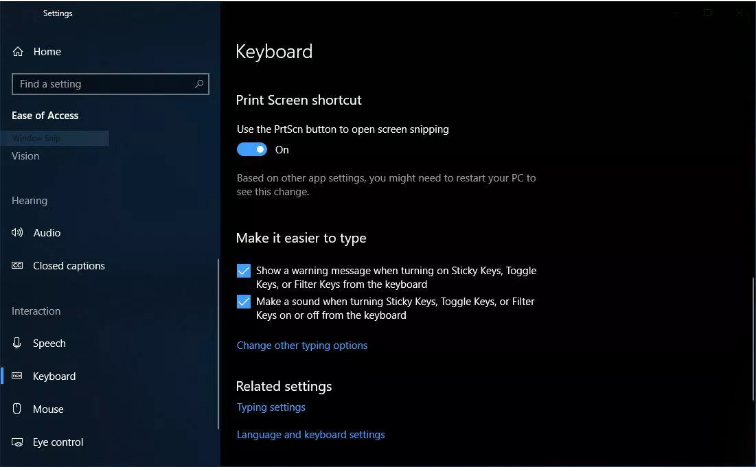
There are many ways to accomplish screenshots in Windows10. The slickest in my opinion is to flip a switch in Settings that allows the “Snip & Sketch” tool to be activated by the Print Screen button on your keyboard. You do this by going to the windows menu (lower left of you screen), selecting Settings (the gear icon) and searching for “print screen”. There’s a switch to flip: “use the PrtScn button to open screen snipping” as in the screenshot below.
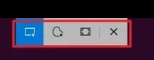
Once you’ve done that, press the Print Screen button and you’ll see the screen become a little bit greyer and a few buttons appear at the top center, allowing you to copy a rectangular region, a window, the whole screen. It remembers your selection the next time too.
After you’ve made your screen shot, its ready to paste (CTRL V) wherever you want. Also, a little window opens in the bottom right of the screen. Clicking on that allows you to save the screenshot in a file, open it to edit, and a few other things.
macOS
There’s not much to say here. Push these three buttons simultaneously and the cursor will turn into a little crosshair that you can drag on the screen to get the rectangle you want to grab.

Here’s a webpage that goes into detail about screenshots on lots of devices.