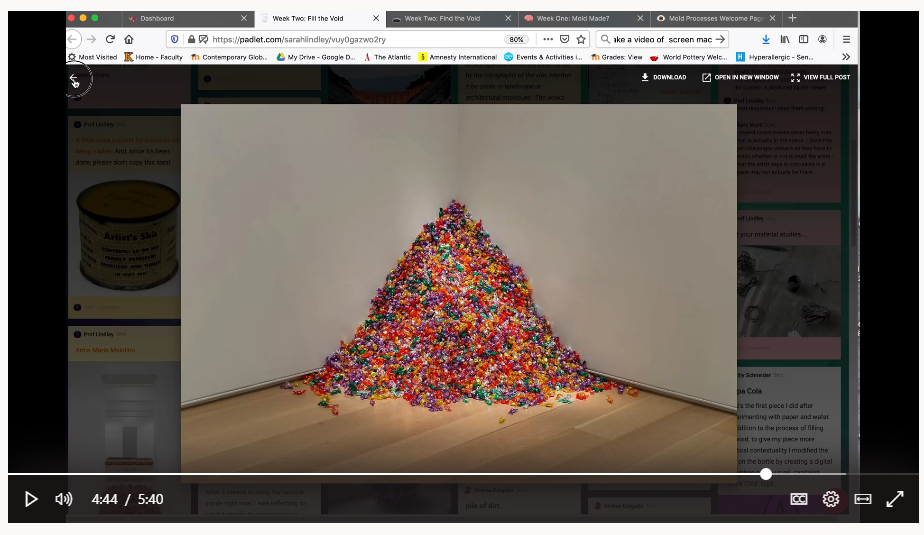
Lots of people wonder how it would be possible to teach ceramics and sculpture online. It turns out that giving up the messy materials of clay and plaster was less disruptive than losing the group discussion and shared workspace that are essential to a sense of community and rapid artistic growth. This 5-minute video shows how I used the interactive platform of Padlet to introduce assignments, emulate a shared workspace environment, and foster asynchronous discussion. Padlet is colorful, easy to use and edit, and encourages creativity. It’s also nonlinear (unless you want it to be), and nonhierarchical. I used my own $10/month account to create all the Padlets, which meant students were able to use a free account for the entire term.
How I used Padlet in my courses. A 5-minute video by Sarah Lindley
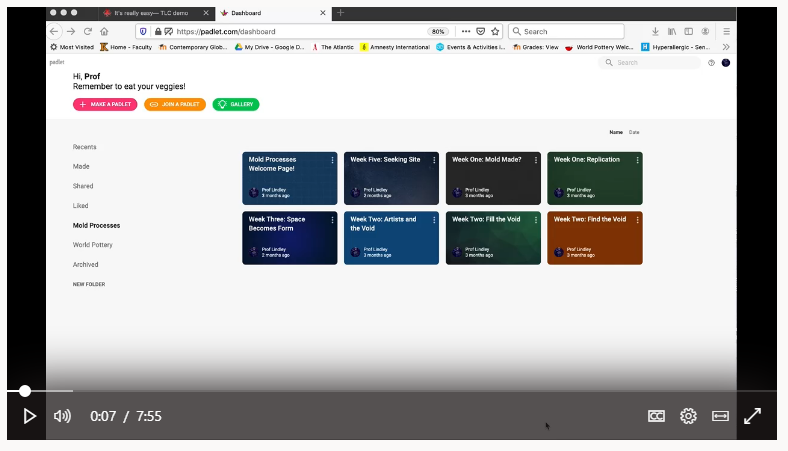
Watch this 8-minute “how to” video to see how easy it is to start using Padlet and visit the Padlet from the video to see how it works.
Getting started with Padlet. An 8-minute video by Sarah Lindley
I don’t like the ads and lack of security with Youtube, so I tried using Vimeo for streaming videos at the beginning of the term. After some consultation with the Amazing Josh Moon, I realized that Streams was easier and better than Youtube, because
you can create the video so it is available to the entire college community, just your class, or just a few people
you can see how many times the video has been viewed
Streams automatically develops text captions for the narrative
no ads
no subscription fee
Alternatively, I also found OneDrive to be very useful for short videos. OneDrive tells you WHO watched the video. That was helpful for having keeping track of engagement.
The focus of this site is going to be links to external long-form sources as a complement to the growing wealth of college-created blogs and videos at the Teaching Commons. At this Moodle site you’ll find links to articles, podcasts, videos, graphics and other content. The emphasis is on topics about which we’ve heard the most feedback over the course of the spring.
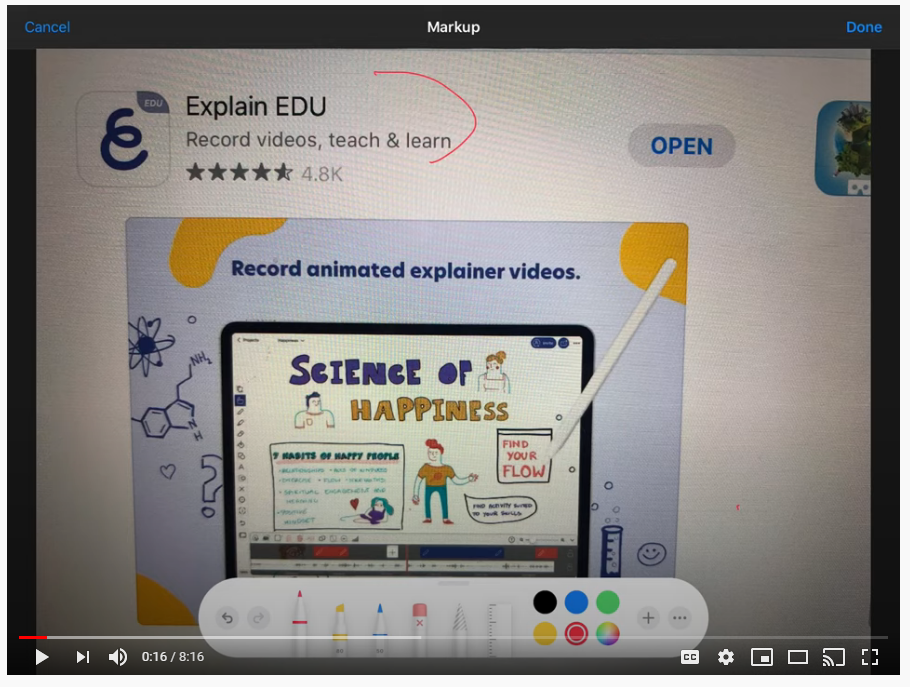
In this video, Ann walks us from beginning to end of the process of using a program called Explain EDU to record lectures . It works on iPhone and iPad. You can import pdf files of your PowerPoint lectures — one slide per page — and then narrate the slides. You can do the narration slide by slide, avoiding having to make one continuous recording. It allows you to draw on the slides as you narrate.
Hi Everyone, I’d like to start by thanking all of you for the effort you are putting in this summer to prepare for the fall term. Particular thanks are due to all members of the Teaching and Learning Committee and especially Rick Barth, Alyce Brady, and Josh Moon, for their work in putting together additional resources and information at #KTeachDev2020 to help with course planning. As you prepare for the fall term, please keep the expectations below in mind, regardless of the format(s) of your courses:
Every course for fall should have an online backbone. This is essential in case you need to shift format of your course during the term due to changes in the general public health situation or your own specific need to self-isolate after travel or exposure to COVID-19. This will require that you build your courses around a core of online-delivered content and assignments with any planned in-person interactions designed so as to allow for meaningful online replacement if needed.
To facilitate the online backbone, all courses must have an active Moodle site. Josh Moon and TLC have provided a number of Moodle templates as part of #KTeachDev2020.
The Higher Learning Commission requires that all faculty have regular and substantive interaction with students. “Regular” means that interaction is on a regular and predictable basis over the course of the term (e.g., in person interactions or virtual activities such as weekly check ins, virtual office hours, recitation type sessions, and the like). Please include information about these interactions in your syllabus and at your Moodle site so that students know what to expect and so that we can provide evidence that this requirement has been met. For “substantive”, the key is that the interaction deals with the course content (not just on procedural or organizational issues), so it would include activities such as direct instruction, responding to questions, facilitating group discussion and the like. There is no stipulation that regular and substantive interaction must be synchronous.
Clear statements for students about course expectations, including schedule, assignments and absence policies are always part of excellent pedagogy and are even more essential with the potential for change within the term, so these need to be part of your syllabus, Moodle site, and other course materials. Faculty are encouraged to reach out to students in fall courses via email in advance of the start of the term to share information about course expectations and format. All faculty currently have access to their class list aliases (for example DEPT101-1-2020fa@kzoo.edu) and can also email students through Web Advisor.
A specific note on attendance policies: All students and employees will be required to stop participating with in person activities if they have any signs of illness. There may also be challenges for our international students in arriving in Kalamazoo for the first day of classes. Attendance policies should be flexible in recognition of these and other contingencies that might arise during the term.
Synchronous Required Course Activities: The Academic Planning Task Force recommends that most classes will be well-served if there are at least some synchronous elements in online courses and some asynchronous elements for in person courses. It is important to note that planning for any required synchronous group activities need to include an option for students to choose the time slot for which the class is currently scheduled in order to avoid course schedule conflicts for students. If you plan to have required synchronous activities and need to explore moving your class time, please contact the Registrar to discuss options.
And a couple of additional items related to teaching in specific formats:
If you are using online formats for interaction or elements such as video lectures, please keep in mind that research on these formats suggests that 30-45 minutes is a typical length of time that people can fully engage with these activities before becoming disengaged or increasingly stressed. For the sake of your own well-being and that of our students, please consider limiting the length of time (or breaking up a longer session into different types of activities).
For classes with in person elements, there will be face covering, distancing, and sanitizing requirements put into place and students and employees are expected to follow those requirements. Physical distancing will require a minimum of six feet between people whenever possible. Enhanced sanitizing of campus buildings, including restrooms and high touch surfaces such as doorknobs will be part of the services provided by Facilities Management. Within classrooms, pre-moistened wipes will be provided and each student or faculty member will be expected to wipe down their own space (e.g., table and chair, tablet desk, teaching station) when they enter the space.
I know from the student feedback I’ve heard that there were many successes during last spring’s distance learning term and it is exciting to build on those successes to create a fall term that’s even better. Please feel free to reach out to me or to members of the Teaching and Learning Committee if you have questions for fall.
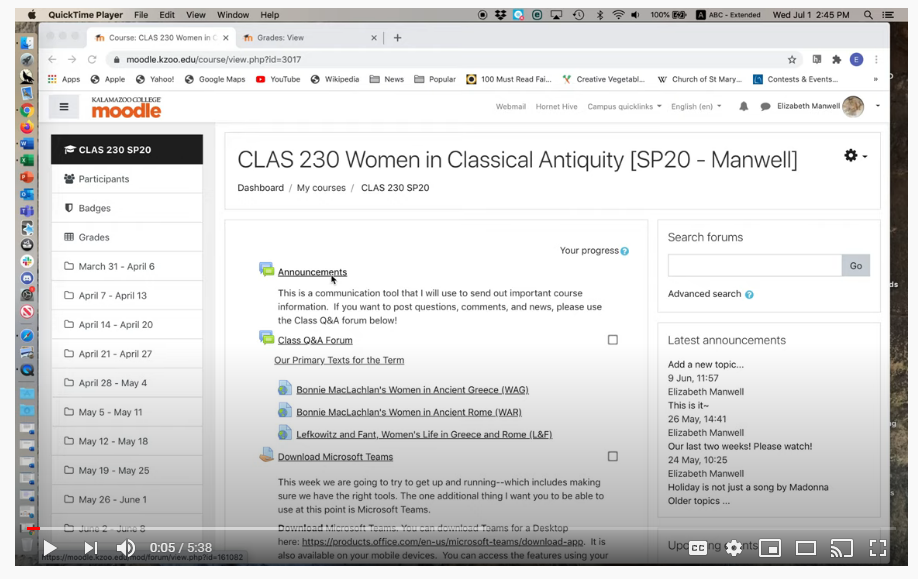
In the Spring, I had students in Taiwan, India, Greece, Spain, and in all US time zones, including Alaska. Their locations, plus complicated work schedules for some students, made synchronous classes unworkable for me. I designed my class to be as accessible as possible, using Moodle.
Pages
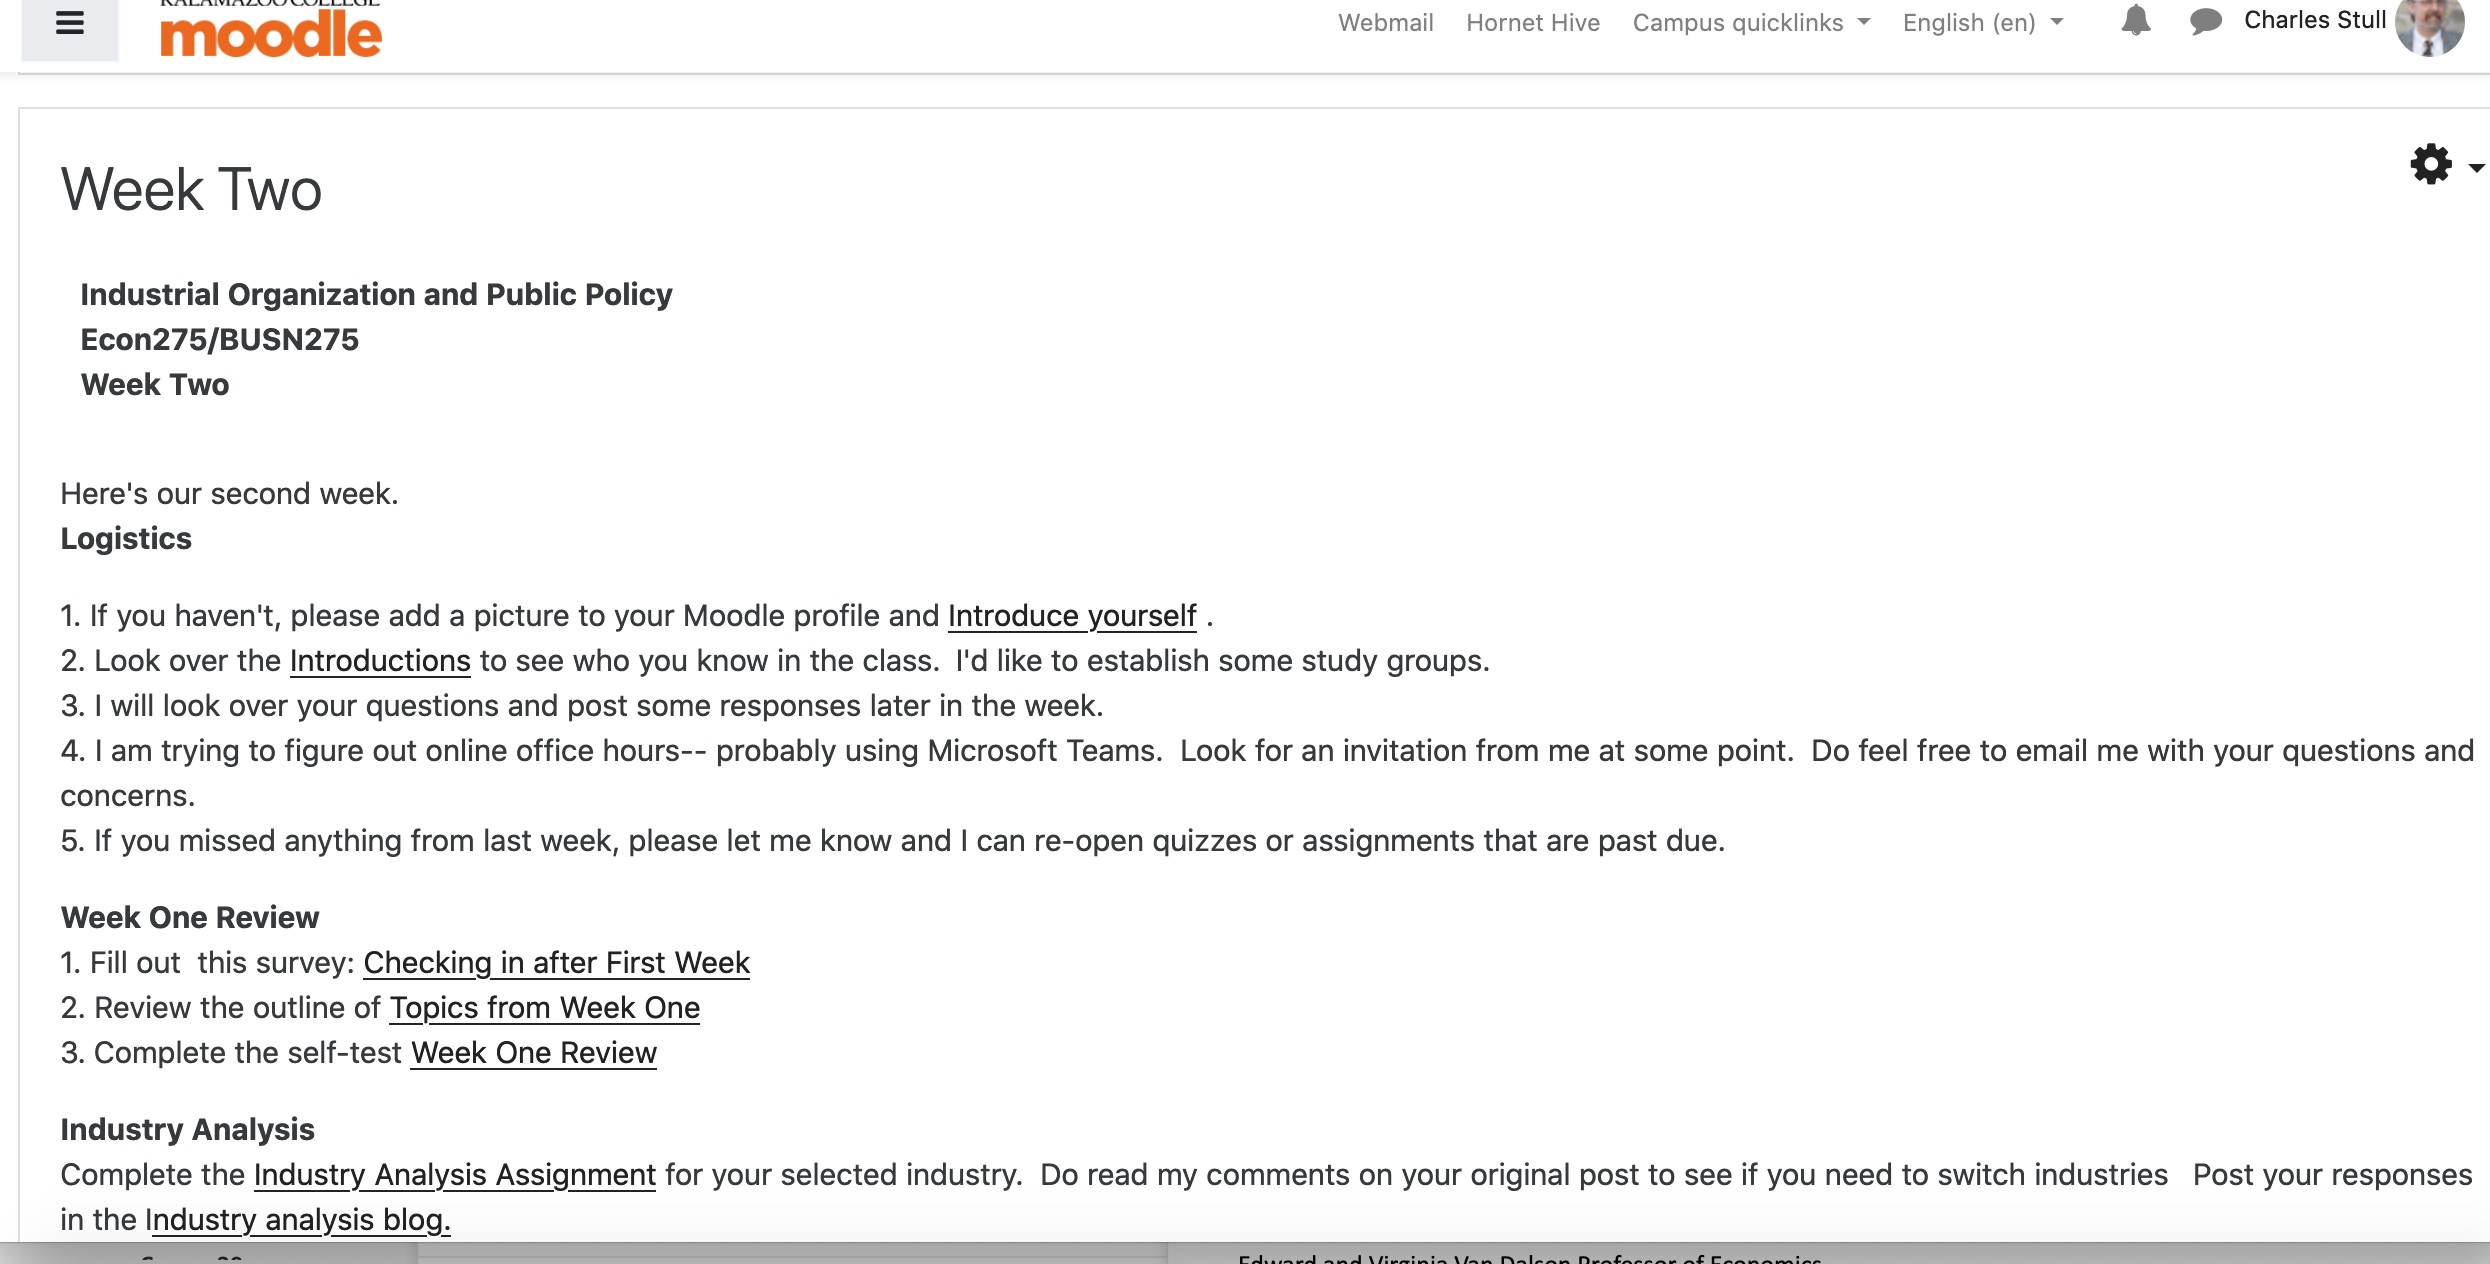
My main organizing tool was a Moodle “Page” for each week. This page listed all of the assignments and activities for that week, with links. At the beginning of the week, I would post a short Moodle Announcement with a link to the page; students would automatically get a copy by email. This gave them three places to access the page— their email inbox, the announcement forum, and in the Moodle section for that week.
I used the following structure for each week’s page:
Logistics. This section was about coordination— discussion groups, deadlines, extensions, etc.
Review. Typically, this section had three parts— an anonymous survey on how the week had gone (using Moodle’s Feedback tool); an outline of the topics we had covered the previous week and an ungraded self-test on those topics.
Project. A short weekly assignment that contributed to their longer research paper that was due late in the quarter.
New Content. This section was the longest part of the page. I would embed 3-6 short videos I had made on the week’s topics. My videos were narrated PowerPoints, posted on YouTube. Each video would be followed by a short quiz or short assignment. Readings, either from the textbook or other sources, would be posted here along with required response questions. I would also assign a few questions related to the week’s content to discuss with their small group and post to the discussion forum.
Here, in two parts, is a screenshot of my Week 2 Moodle Page. Click on each image to see them full size:
Deadlines
Everything was due at the same time at the end of the week. In practice this meant, some students worked through everything as soon as it was posted; some spread the work throughout the week; and some waited until just before the deadline to start. (I initially set the deadlines for both my classes at the same time but that was too difficult for me, so I ended up staggering them— one due Sunday night and the other class due Monday night.) I opened the next week’s work the following morning.
Labels
Labels were a really useful Moodle tool that I hadn’t used earlier. I used simple boldface titles to identify related material and assignments on Moodle. I used photos as labels to differentiate my courses.
Review, Enrichment, and Advanced
I included some optional materials on Moodle. Econ 101 was a prerequisite for one of my classes. I linked videos and chapters from online textbooks on topics and models that they needed to remember. Beyond the review materials, each week I would try to provide links for students who had the time and interest to learn more. “Enrichment” materials provided a deeper view into particular aspects of a week’s topics. These weren’t more difficult, but they provided additional insights. “Advanced” materials were for students who were looking for additional challenges. They were beyond what I would require for this level class but would be accessible to some students.
“Selfie” videos
A few times during the quarter, I shared very short videos of myself— walking around campus or looking at the late Spring snowstorm. These were really just greetings, as opposed to course content. My intent was to try to make remote delivery a little more personal.
Overall, this approach worked well for me. It didn’t rely on sophisticated technology and students responded favorably to the organization.
We’ve heard many requests to help students submit video content to their instructors with College resources. Microsoft Stream provides a place for students to upload large video files and control who has access to them. Think of it as a private, Kalamazoo College YouTube where you pick who gets to see your videos. Click here to learn more about Stream.
First, let’s talk about making the videos. If students are creating a video elsewhere, like in an editing lab or on their personal device, they can upload a pre-made video to Stream. To do this, one member has to log in to Microsoft Stream and upload the video. We’ll talk about sharing that video with others in a moment.
Let’s assume they want to use Teams and a group Call to make the recording. This involves a few simple steps inside Teams. One group member can start a new Chat with two or more participants. Invite the participants and hit Enter.
Once everyone is ready, click the Call button in the upper right.
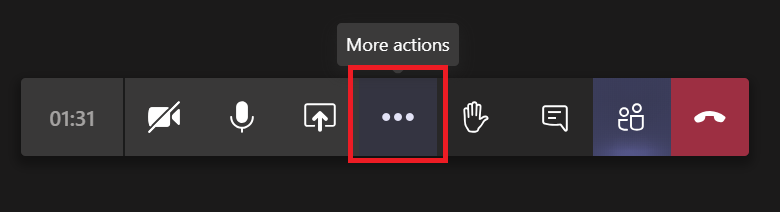
Have one participant initialize the recording by clicking More Actions… in the Menu
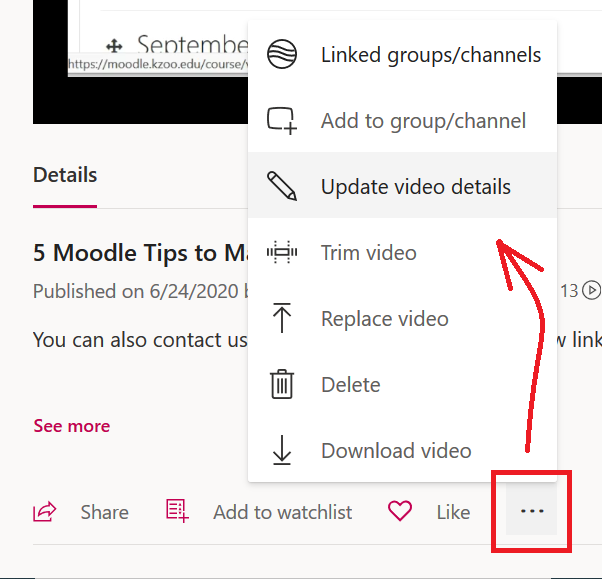
Once the recording is complete, go back to More Actions and quit the recording. The video will automatically begin uploading to Microsoft Stream as part of our Microsoft integration. Stream will take time (minutes, not hours) to fully process the video depending on the size. The participant who clicked the recording option will have access first, while other members will wait for processing. In order to extend access to an instructor or another recipient, the participant who started the recording will need to “Update video details” and access the Permissions in Stream. Choose individuals to grant access to and empower other participants as owners if necessary. If the student uploaded their own video, this is where they can share it with group members and instructors as well. For more information, please watch Giving Permission to View a Private Video on Stream on the Tech Talk channel.
Now that these individuals have access, that same participant can use the Email feature to share the video directly to the email of the instructor or other recipients. Note: sending an email or creating an embed will not expand who can access the video. That must be done in the Permissions.
It is easy (intentionally or otherwise) to have Microsoft Stream allow everyone in the College to access a video. With these steps, students should be able to use Teams and Stream to complete a video project, share it with select individuals, and limit the access to others. With video being so popular in online learning and collaboration, we hope this answers some question on how to execute such a project.
That means students will not be automatically added to your Moodle site. The easiest solution is to copy and paste the URL for the course and email this to students. That will lead them directly to your course. They can also navigate to it in the categories at the College’s moodle home page.
2. Moodle sites are made up of Activities and Resources
You can add two types of
elements to a Moodle courses – Activities and Resources. You might think of
Activities as where students provide the content and perform tasks (Forums,
Assignments, Quizzes, etc.) and Resources as elements provided by the
instructor (Files, URLs, Lessons, etc.).
You can add these to any of your week modules and move them around as
needed by drag and dropping.
3. Everything in Moodle has settings!
This might sound obvious, but as a community-build, open-source project, Moodle tries to be everything to everyone. There are a number of settings for any particular element and most of those settings you will not need to worry about. However, it is useful to be aware that the gear wheel icon ( ) on the main page of the course includes the settings for the class, while elements like Files, Forums, and others have their own “Edit” options to access the settings. Don’t hesitate to ask if you have a question about what a setting does! Also, Moodle’s question mark icons ( ) can be useful quick references.
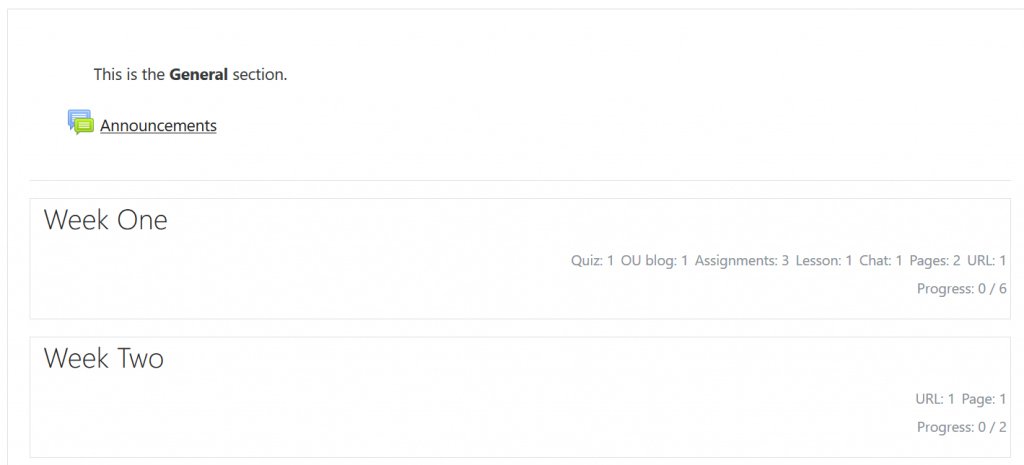
4. The default format shows a preview of each week, not all the content.
Old Moodle themes used to place all the content in one
long list resulting in what was commonly called the “scroll of death.” Our Boost theme shows the name of the section
and displays any text written in the week’s header (that’s what you access when
you click “Edit Week.”) Students can
click the title of the week and that will take them to the Activities and
Resources for that section with the General (top) section above. This reduces the scroll considerably as the
quarter goes on. To maximize the value
of this design, avoid putting too much content inside “Edit Week.” Use Labels
and other Moodle resources within the section instead. Place important material like the syllabus,
non-time specific content, and course-long material in the persistent General
(top) section.
5. Don’t go it alone as you start on the Grade Book
With some preparation and organization, the Moodle grade book will provide accurate grades for the instructor and to each individual student. However, it isn’t completely intuitive in every situation. Save wasted time and headaches by asking for my help with the grade book . That is what I’m here for! If you want to jump in alone, please preview this video Moodle Grade Book – The Basics.
I spent what felt like a lot of time this summer in online workshops about how to teach online. I learned a lot of things — both by positive and negative association! — that will help me make my fall courses have better online content. Here are 5 big things I have in mind.
Community of Inquiry Framework in online course design
Bloom’s Taxonomy and Synchrony
Same Goals, different modalities
Variety in instructional modes
Sit in an online course yourself
A 7.5 minute video by Rick Barth
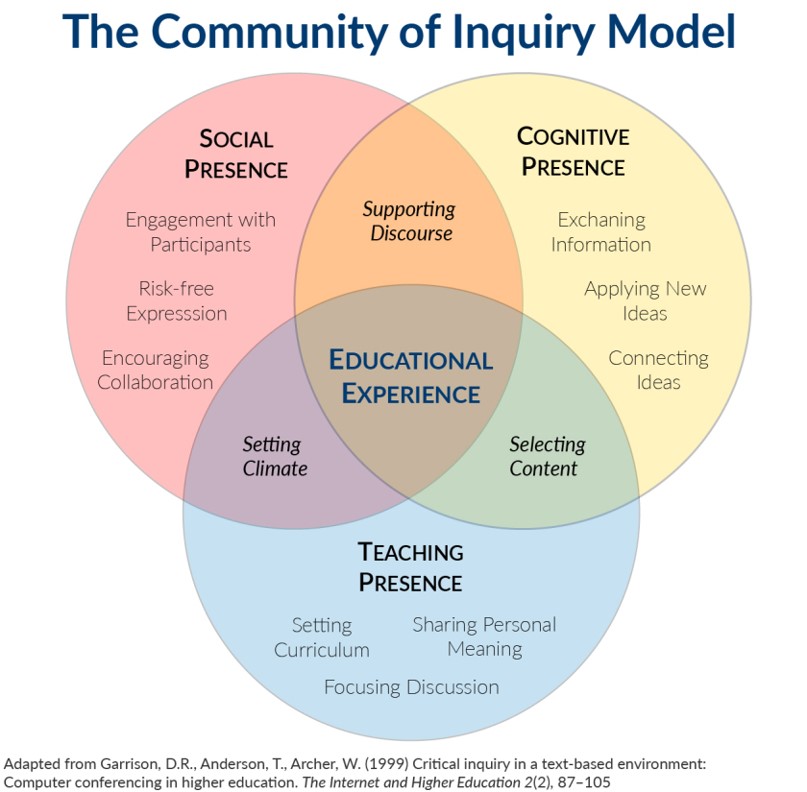
1. Community of InquiryFramework and Supporting Discourse
Like a lot of instructors at K, I’ve been thinking about how to foster community and support discourse among students in my classes. I’ve found myself stuck on that question and honestly discouraged by what felt like a lot of disconnected student experiences in my spring class. I gained some insight during an online session this summer centered on the Community of Inquiry Framework. In particular, my breakthrough moment came from looking at the pair-wise regions of intersection between the “Presences” — Teaching, Cognitive, and Social:
Selecting Content
Supporting Discourse
Setting Climate
In the spring I gave a lot of thought to Selecting Content, and in struggling with ways to Supporting Discourse, I hadn’t fully considered the role of my teaching presence in Setting Climate. As an example, is his piece at the TLC Summer Teaching Development site, David Rhoa talks about how he noticed that students, if left to make that decision on their own, would often turn off their web cameras during synchronous video group meetings and by doing so be effectively absent from the discussion. He says if he had to do it again, he would set the expectation that students take part fully by keeping their cameras on. That’s Climate Setting! Now that we have some experience about how things can tend to happen, we are in a better place to set climate from the start to support discourse.
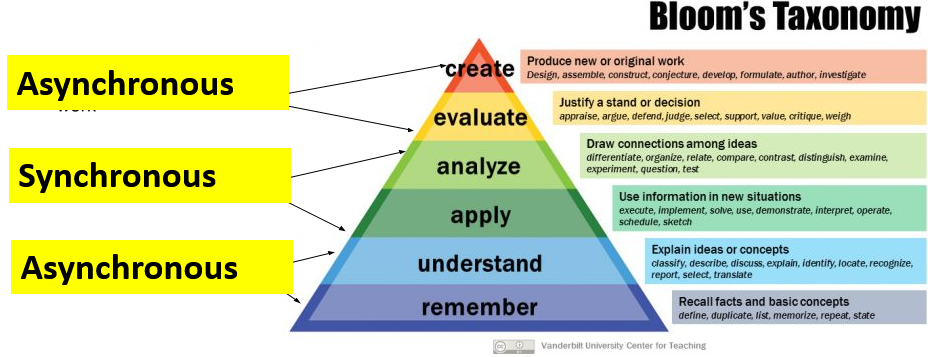
2. Bloom’s Taxonomy and Synchrony
Synchronous or Asynchronous? That’s a question I’ve spent a lot of discussion time on, often framed by various concerns that don’t pertain directly to teaching and learning: Students scattered across many time zones and other scheduling difficulties, technical challenges of large live video meetings, technical challenges of producing compelling video content, etc.
I had a pleasant aha moment last week when a participant in a big teaching seminar mentioned this paper in passing. The figure below is modified from that paper. The idea that grabbed me was that in organizing the kinds of learning I want students to achieve using Bloom’s Taxonomy, the timeline of learning activities seemed to fit very neatly:
At the base of the pyramid, it seems clear to me that students read, hear, remember and understand concepts at highly individual rates. Those activities are perfectly suited for outside of class reading assignments, pre-discussion activities, and my recorded video lectures — all things that students can do at their own speed and in their own time.
The middle layers of the pyramid are better suited for real-time interactions: Discussions with and between students that suggest and interrogate connections and contexts for ideas.
Finally, the tip of the pyramid takes repeated concerted attempts and lots of time — more than can be sustained in a Teams meeting. That’s where asynchronous delivery returns.
I’ve heard Josh Moon say many times that real-time interaction with students should be spent checking in and having conversations. One-way communication of content is best done asynchronously.
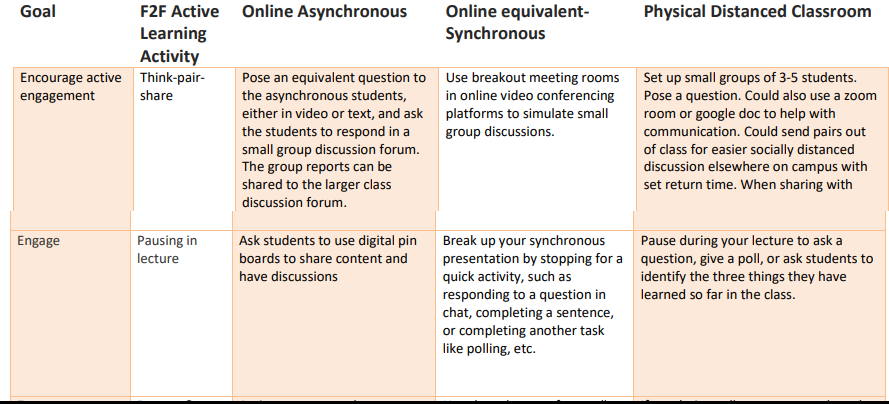
3. Same Goals, Different Modalities
There’s a lot to be said for designing an online course using Backward Design Principles. Sometimes though I find myself thinking backwards in a bad way: I sometimes look at what a technology platform is capable of doing and then try to build a teaching and learning activity with that as the basis. I sometimes forget that effective teaching and learning activities aren’t good only because they’re in person and face to face — that just happens to be the only modality I was really fluent in before Covid 19.
This idea — adapting existing active learning practices to online delivery modes — is at the heart of this handy table which lists teaching goals, traditional classroom active learning strategies and then suggests adaptations to online asynchronous, synchronous virtual online, and physically distanced face-to-face environments. I’ve excerpted a few rows of the table below:
I don’t really think of myself as a person with a bad attitude. That changed this summer. To prepare better for my work with TLC on the Summer Teaching Development resource, I registered for a number of multi-day online seminars for college teachers in the emerging world of online instructors.
I was already starting to feel a skin-crawling discontent by the time I logged in at the website for the first seminar! Before I even knew my registration was successful, my email inbox began rapidly filling with dozens of “get to know me” emails from the other participants: “Hi, I’m Matt from Plynthville College, Looking forward to the seminar!” Upon signing in, I learned that the first assignment of all participants was to type a message board introduction myself and comment on several others: “Nice to meet you Matt. I’ve heard great things about Plynthville.”
Over the following few days, I learned that it is really hard to sit in front of the screen and stay connected with my 30 classmates during a 90 minute video lecture. I learned that “enter your response in the chat” in a group that size results in a rapidly scrolling stream of consciousness with only the first and last entries, or those that already contain the vocabulary we’re trying to learn, gaining the attention of the instructor. I learned that the “raise my hand” feature works just as well or poorly as in any other large lecture: unless carefully managed, the same person raises their hand and talks repeatedly, day after day.
I learned from that experience the powerful lesson that there are lots of online teaching practices that I don’t want to use in my own course! As they say “experience is the best teacher.” But as a person who is really curious about how effective teaching works, I think I discovered how to do some of those things better. Try it. What you don’t find helpful might be the most useful thing for you to learn.
I used “feedback” in Moodle to create a quick quiz/assignment that I used to gauge reading comprehension of the “theoretical” piece we read in class each week. Giving feedback to students using it was the least elegant aspect, but it was otherwise a good and quick way to check their understanding of the main points.


 ) on the main page of the course includes the settings for the class, while elements like Files, Forums, and others have their own “Edit” options to access the settings. Don’t hesitate to ask if you have a question about what a setting does! Also, Moodle’s question mark icons (