Activity Completion in Moodle

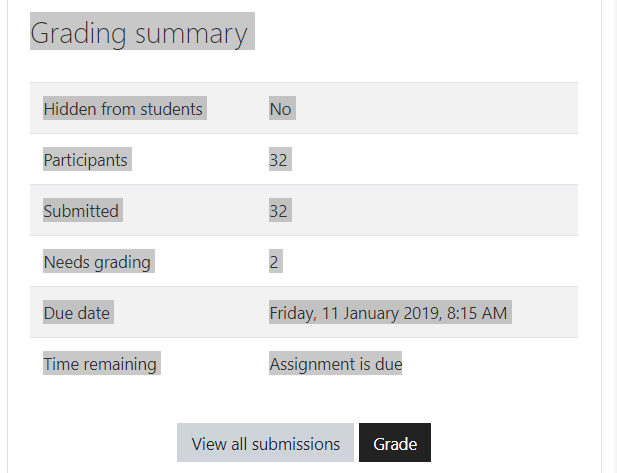
The Activity Completion feature in Moodle helpful for students to keep their work in your course organized, and can be motivating for them: there’s a feeling of accomplishment when checking those boxes!

A 10-minute video by Josh Moon

This video is posted at Stream. Click here to learn more about Stream.

COVID-19 Spring – It turns out some of my choices align with recommended practices! — Jeff Bartz

After a week of doomsday scrolling in March 2020, it was time to get to work. But what work? The technology options, activity alternatives, and advice for virtual classes were overwhelming. I made some choices and they ended up aligning well with a list of recommended practices published in July 2020:

RECOMMENDED PRACTICES FOR ONLINE INSTRUCTION from Means, B.; Neisler, J. Suddenly Online: A National Survey of Undergraduates During the COVID-19 Pandemic; Digital Promise: San Mateo, CA, 2020.

  1. Assignments that ask students to express what they have learned and what they still need to learn
  2. Breaking up class activities into shorter pieces than in an in-person course
  3. Frequent quizzes or other assessments
  4. Live sessions in which students can ask questions and participate in discussions
  5. Meeting in “breakout groups” during a live class
  6. Personal messages to individual students about how they are doing in the course or to make sure they can access course materials
  7. Using real world examples to illustrate course content
  8. Work on group projects separately from the course meetings

Without knowing that I was doing it, my class was constructed using aspects of Design Thinking. Our class had five major themes – Energy, Efficiency, Fuels, Climate Change, and the Ozone Hole – I thought the major themes would keep the students (and the instructor) interested. Assignments and activities were geared toward understanding the major themes using the standard physical chemistry that we have done at Kalamazoo College for decades.

Our class had asynchronous components aligned with the MWF schedule, with online assignments due each day. Some of the asynchronous activities in Spring 2020 were the same as if we would have met in-person: recorded flipped lectures linked on Moodle, targeted textbook reading, Moodle quizzes on the flipped lectures, Moodle quizzes on the targeted reading, and electronic homework. Students did one assignment looking at aspects of energy they thought would be interesting for the professor to learn. I collected laboratory data and asked the students to analyze it in the same way we would have done in-person.

The synchronous components were weekly problem solving sessions over Zoom. The students showed up, did a warm-up activity, solved problems in breakout rooms, then came back for a closing activity.

Here is how I implemented the recommended practices for online instruction:

Practice Implementation Needs Work
1. Reflection on Learning
2. Breaking up class activities
  • MWF Flipped Lectures made with Explain Everything on an iPad
  • Lecture uploaded to YouTube; link posted on Moodle
  • Targeted textbook reading
  • Homework through Mastering Chemistry
  • Break lectures into even smaller chunks (12-20 minutes and then 4-7 minutes)
  • Mix quiz questions with smaller lectures
  • First-year students should upload their notes from each flipped lecture for credit.
  • Need comprehensive instructions for all activities
  • 3. Frequent Quizzes
  • Embedded questions in lecture
  • Post-lecture T/F on Moodle
  • Pre-class questions on targeted reading
  • All quizzes were low stakes
  • Add more embedded questions
    4. Live sessions Figure out when to hold sessions
  • Students indicated their availability using a simple scheduling site when2meet
  • Live session times were hosted through Zoom
  • Students indicated which session they would attend by a Doodle Poll each week
  • Sessions involved an ice breaker, some problem-solving in breakouts, announcements, and a low-stakes quiz using Kahoot!
  • Add more accountability to the live sessions.
  • Collect materials from students
  • Add a variety of materials in the live sessions including
    • Applications of the material
    • Process Oriented Guided Inquiry Learning activities (POGIL))
  • Need comprehensive instructions for all activities
  • 5. Breakout rooms during class
    • Easy to do in Zoom
    • Instructor emailed the problems to discuss before live class started
    When I popped into some breakout rooms all the microphones where muted. I need to assign roles to the groups and have somebody report out the results from the group. A helpful resource for groupwork
    6. Personal messages With lots of online work, professor can see each student’s progress. Students who were falling behind got messages either email or instant messages through Remind or Slack. More students chose Remind than Slack.
  • Remind will allow the instructor to send out a message to everyone, which could be a way to check in with the class
  • A problem even in face-to-face is how to interpret the silences
  • 7. Real-world examples Created a pre-class movie trailer to describe the applications using iMovie that was sent to all of the students. Putting out the applications that we would study made it important to work them into the class.
    8. Group projects Students chose whether they wanted to work in laboratory groups. Should we do more group work?
    Pros:
  • Working online is isolating
  • Students have 168 hours in a week to schedule a meetup
  • Students gave feedback that working in groups was helpful
  • Fewer papers to grade
    Cons:
  • Some students despise group work
  • One more thing to set up and monitor
  • Online Shared Workspace Environment with Padlet — Sarah Lindley

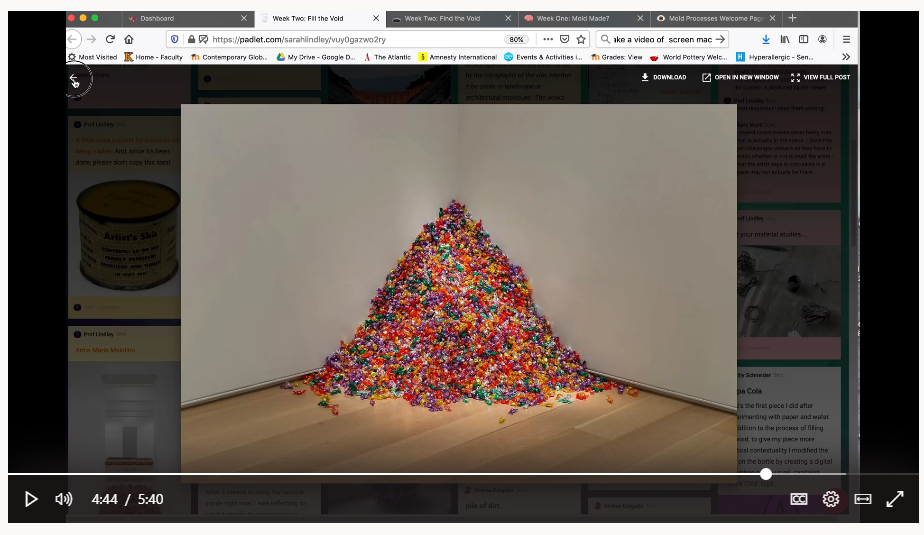
    Lots of people wonder how it would be possible to teach ceramics and sculpture online. It turns out that giving up the messy materials of clay and plaster was less disruptive than losing the group discussion and shared workspace that are essential to a sense of community and rapid artistic growth. This 5-minute video shows how I used the interactive platform of Padlet to introduce assignments, emulate a shared workspace environment, and foster asynchronous discussion. Padlet is colorful, easy to use and edit, and encourages creativity. It’s also nonlinear (unless you want it to be), and nonhierarchical. I used my own $10/month account to create all the Padlets, which meant students were able to use a free account for the entire term.

    How I used Padlet in my courses. A 5-minute video by Sarah Lindley

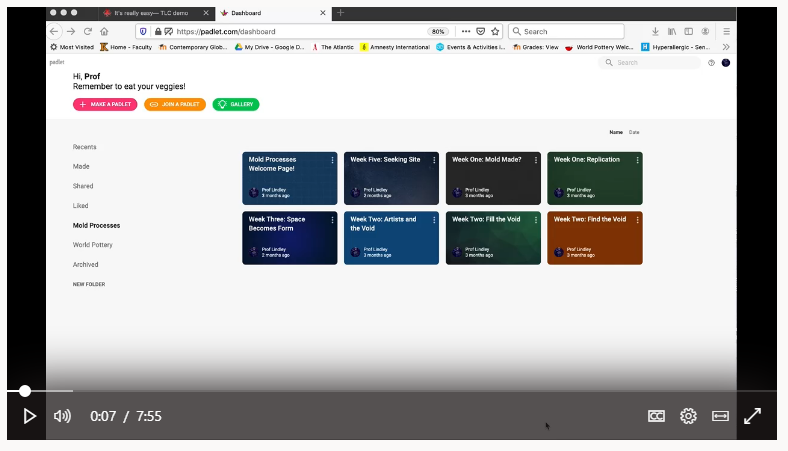
    Watch this 8-minute “how to” video to see how easy it is to start using Padlet and visit the Padlet from the video to see how it works. 

    Getting started with Padlet. An 8-minute video by Sarah Lindley

    These videos are posted at Stream. Click here to learn more.

    I don’t like the ads and lack of security with Youtube, so I tried using Vimeo for streaming videos at the beginning of the term. After some consultation with the Amazing Josh Moon, I realized that Streams was easier and better than Youtube, because  

    • videos can be linked directly to Team sites and/or you can even create a closed video channel for your class
    • you can create the video so it is available to the entire college community, just your class, or just a few people
    • you can see how many times the video has been viewed
    • Streams automatically develops text captions for the narrative
    • no ads
    • no subscription fee

    Alternatively, I also found OneDrive to be very useful for short videos. OneDrive tells you WHO watched the video. That was helpful for having keeping track of engagement.

    Five Things to Promote Equity in an Online Class — Josh Moon

    I started working in online learning ten years ago as a teaching assistant in graduate school. The idea of equity and compassionate practices weren’t on my radar then. We asked students to submit pictures to verify their activity outside of class, used digital plagiarism tools, and requested documentation when they missed time (including for funerals. Gross, I know.). It’s been a long journey to think about my own online teaching practices but I can say, thanks to the writing and collaboration of many far-more thoughtful writers on education, I am now more prepared to acknowledge online practices that marginalize, jeopardize, and insult students and consider how to remedy them.

    As I said, I’m not an expert and I hang on the coattails of people like Chris Gilliard, Jessie Stommel, Maha Bali, Cathy Davidson, and many others. I’ve linked longer articles in a section of my Moodle page, but if you want my own summary impressions I’ll offer five things I feel like I’m learning about equity in an online class.

    (Author’s note: I recognize that a lot of this work is conceptual and more about broad approaches to teaching online than “Hello unsure instructor, do thing X!” I wanted to provide something more concrete as well. Peralta CC has an Online Equity Rubric with multiple categories including Images & Representation, Content Meaning, and Technology. It could help one think about practices in your class.)

    Trust students.

    This might sound simple, but this is the pedagogical starting point offered by Jesse Stommel, co-author of An Urgency of Teachers and co-founder of the Digital Pedagogy Lab. Recognizing our students’ humanity and integrity as a starting point allows us to cultivate authentic learning relationships built upon respect. If we are concerned about cheating online, consider what factors encourage academic dishonesty. How do we avoid presenting temptations to practice academic dishonesty? How do we craft learning experiences and assignments that make the work more attractive than the grade? What do we gain when we trust students?

    Add multiple methods to engage content and build in redundancies.

    I know we want to keep it simple but “provide multiple means of engagement” is one of the core principles of Universal Design for Learning. In discussing Resilient Design, Andrea Kaston Tange shares an anecdote about a colleague offering students an option to attend class or use the online discussion board if they needed. This could be expanded in an online context to allow multiple avenues for students to write – a discussion board for some, an individual writing assignment, or in-text annotation for others. Offer students choices. Do different things some weeks. This opens avenues for student agency and adaptation to their needs.

    Consider Privacy, Access, and Student Data when Selecting Software and Platforms.

    Every time we choose another digital tool for students to install, sign up for, and otherwise employ, we expose their work, identity, and information to a third-party. We also increase the risk of taxing their device hardware, internet connection, and ability to learn new tech. This doesn’t mean we can’t adopt innovative, helpful technology, but we should be thoughtful and perform vetting of technology tools. The slickest, most attractive technology product isn’t necessarily the company doing the most to value student privacy or to ensure that it is accessible to all.

    Acknowledge trauma, grief, and distraction.

    Cathy Davidson makes the claim that, “Trauma is not an add on. From everything we know about learning, if the trauma is not addressed, accounted for, and built into the course design, we fail. Our students fail. None of us needs another failure.” We have to account for this in our current pedagogical situation. We fail when we try to maintain a false sense of total normalcy. Students may wish to focus and absorb themselves in our classes, but trauma is not equally distributed along difference. Look for ways to acknowledge what students are experiencing while our courses are only one piece of their lives. Maha Bali is a great thinker on the Pedagogy of Care.

    Recognize that Online Learning can Work and Respond Accordingly.

    I admit that this might sound a little soapbox-y, but you’re still reading so here we go. The following statement is written by me, Josh Moon, and does not necessarily represent the view…you get it. Though we all recognize what a rich experience it is to be in the room with our students, discussing, challenging, exploring, and experimenting, we also need to recognize that nationally and globally students are learning online in huge numbers. There are opportunities to expand educational access, promote different types of learning, and model professional practices that students will perform outside of college on platforms like Slack, Teams, and others. To hang on to the idea that students can only learn and collaborate in a certain environment is a form of academic privilege. There are great online courses and conversely face-to-face flops even at private, liberal arts schools. Just like students, this is a place where the instructor’s attitude and approach impacts success. If we don’t engage the process, we reward the students who are going to achieve high grades regardless of what we do.

    Quizzes and Assignments in Moodle Make Feedback Easy

    Frequent assessment and timely, detailed feedback are hallmarks for successful course design in any situation, and all-the-more so as we move to online course delivery. I’ve been using Moodle quizzes and assignments for ten years and find that it fits a high-volume workflow in a way the efficiently makes use of my time while allowing for prompt and personal feedback to students.

    In this 13-minute video,

    • I construct a sample quiz from scratch in Moodle.
    • construct a sample assignment in Moodle
    • show a number of options available from within Moodle for me to quickly provide detailed feedback to students about their work.
    A 13-minute video by Rick Barth

    Getting Started with Moodle — Josh Moon

    When someone is using Moodle for the first time, I like to invite them into my office so we can sit side-by-side and look at the interface together. Recognizing that we will have many new Moodle users and meeting in person with everyone is neither prudent nor feasible, I’ve set up a set of resources to help provide multiple entry points. First, if you’re more interested in a visual explanation, I’ve created a video walk-through the follows closely to the welcome conversation that I like to have.

    An 11-minute video by Josh Moon. This video is posted at Stream. Click here to learn more about Stream.

    Let me talk about some helpful points to get you started!

    Don’t worry if you’re starting slowly. Your course Moodle site will not be visible to students when it is created; it will not be visible until you decide you are ready for it to be visible. When you are ready, go into your course settings (gear wheel icon in the upper right) and switch Course Visibility to “show.” Even if you open your class for Week One, you can hide any future weeks as you develop them.

    Moodle has many features, but faculty are free to use as few or as many as seem appropriate for their course and their teaching style. A useful minimal set of information to provide on your course site would be a copy of your syllabus, contact information for your students to contact you (e.g., email address or Teams chat, etc), and links to other resources used by your class (e.g., Teams site, external software, etc) if you’re not primarily going to use Moodle. In another post in the #KTeachDev2020 collection, we demonstrate different options for using the platform from high-engagement to a minimalist link hub.

    Tips to get the basics:
    • Add a syllabus. With your Editing On, drag-or-drop a PDF, Word doc, or your format of choice.
    • Use the URL resource to post any vital links students will need to access features of the course.
    • Add your contact information and any other important text. You can use a “Label” or edit your sections to add text, images, and formatting.

    Moodle site sections can be organized by week (Weeks 1 – 10 + exam week) or by topic. The “by-week” organization is the most commonly used at K, so this is what will be set up by default. If you would rather have your page organized by topic, please let me know (josh.moon@kzoo.edu) and we can work on a format to better meet your needs.

    Popular beginning features in Moodle including Assignment dropboxs, sharing files, adding Discussion Forums, and providing links. To avoid cognitive overload, I won’t be using this post to describe full-tutorials. Instead, I’ll direct you to Moodle 101 resources as another place to look around.

    In addition to this post, the linked resources, and other content, I’ll be offering a synchronous Moodle 101 session for anyone who is able to attend. If you’d like to fill-out this Doodle poll by Saturday, July 18, I will send out a final time to accommodate as many as possible. We’ll record the session for anyone who can’t attend.

    Looked forward to making your Fall Quarter Moodle a success!

    Four Models for Your Moodle Course — Josh Moon

    Using Moodle does not mean that there is one solution for every instructor, group of students, discipline, or pedagogy. With this in mind, we’ve created four different models to demonstrate what various utilizations of Moodle by an instructor might look like:

    • The Basics: A very simple, minimalist Moodle example
    • A full-featured example using many features
    • The Course Reserve: An example of a Moodle site that serves mostly as a course reserve of readings
    • The Link Hub: An example of a Moodle site that merely provides links to other sites (e.g., Teams site)

    There are other options imaginable, so adjust these to meet your needs.

    The Basics

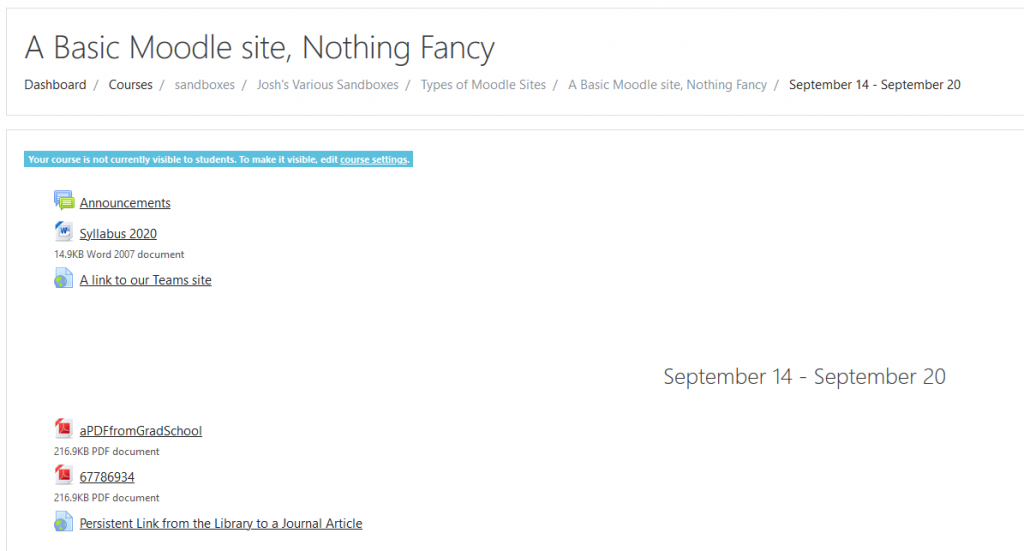
    This is quickest, simplest approach using the default course format. The instructor here has dragged-and-dropped their readings and other files directly from their computer (note: this brings along the file names but you can clean that up). They’ve done the same with the syllabus and added a few links with the URL tool. There are no explanatory text or instructions, no Assignment dropboxes, but that’s okay. This is the basics to provide students with the syllabus and readings.

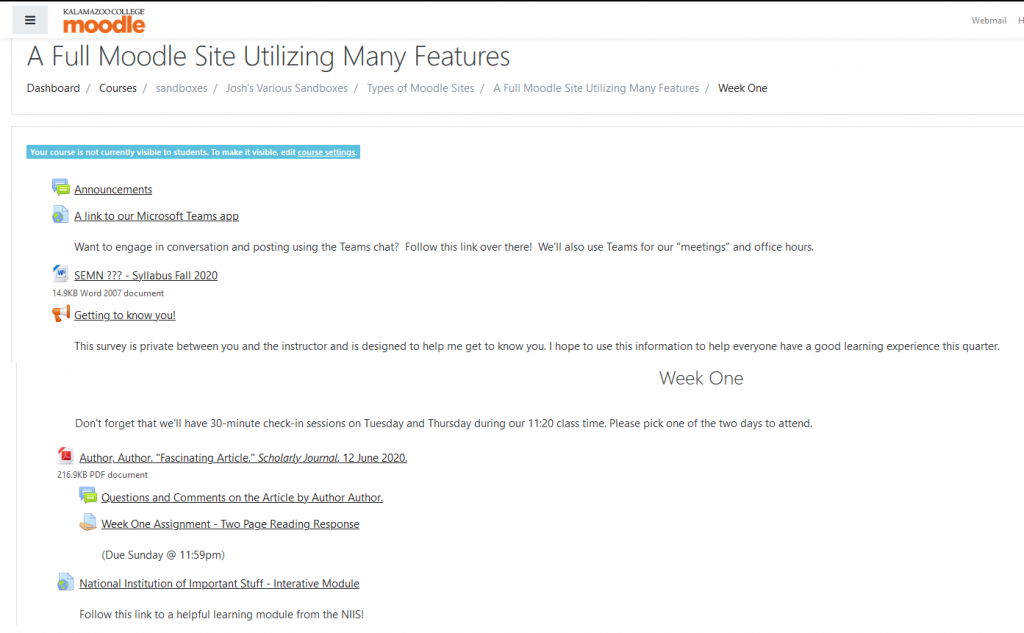
    A Full Moodle Site Utilizing Many Features

    My “How to Organize a Week of Online Learning in Moodle” post from spring is based on this model. While this uses a similar weekly structure to The Basics site, you’ll see important differences. In terms of formatting, the instructor has used the Description fields to offer explanatory text about activities. File names have also been cleaned up and renamed (full citations are a copyright recommendation). They have added more tools including a discussion Forum, Assignment dropbox, and a Feedback survey. Some resources utilize “Move Right” to imply their direct relationship to the reading PDF and provide structure. Again, there are many gradients between this option and the Basics. It’s all about the features you and students could benefit from.

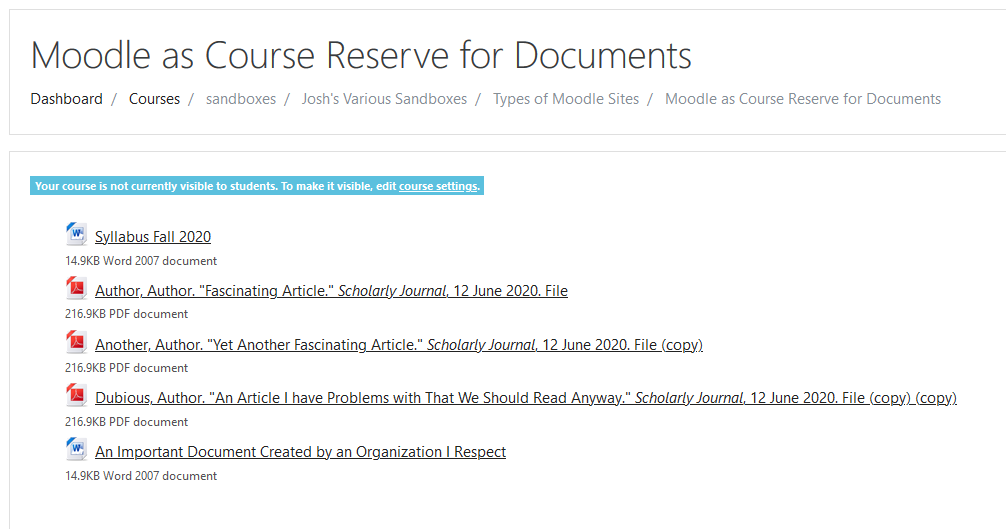
    The “Course Reserve.”

    This Moodle site has done away with the weekly format and placed all content in a list at the General (top) section. The idea here is to replicate a course reserve and supply students with the reading documents that they need for the quarter. If you already have a plan to facilitate discussion, support collaboration, receive assignments, and just need a convenient space to supply students with documents, this is the template for you.

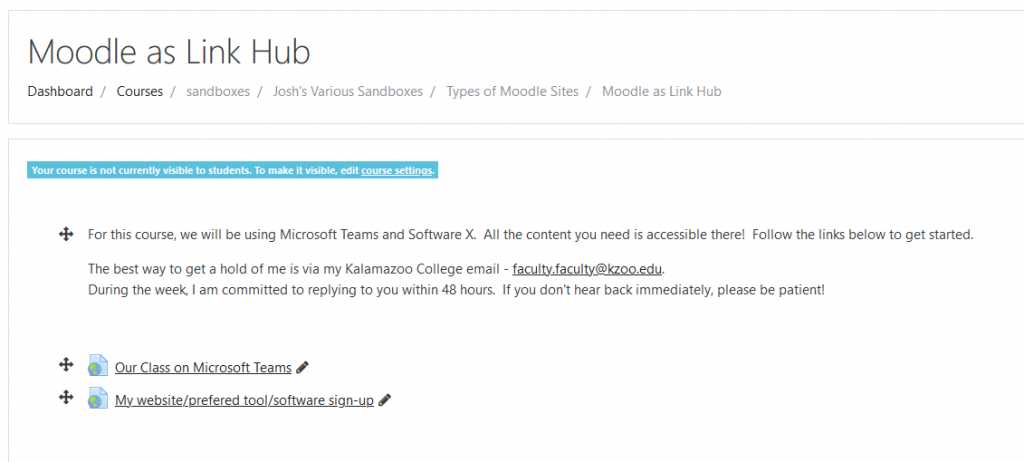
    The Link Hub

    If you’re doing all of your digital communication with students on another platform or with other software, you can keep Moodle to a jumping off point with links. Even if you’re not spending much (or any!) time on Moodle, the goal here is to help students stay organized and have at least one, consistent hub to keep their online course content accessible that every instructor is using in some capacity.

    Summer Teaching Development Moodle Site

    Summer Teaching Development Moodle Site

    The focus of this site is going to be links to external long-form sources as a complement to the growing wealth of college-created blogs and videos at the Teaching Commons. At this Moodle site you’ll find links to articles, podcasts, videos, graphics and other content. The emphasis is on topics about which we’ve heard the most feedback over the course of the spring.

    Taming the “Brute Force” Approach to Create a More Sustainable Online Course — Patrik Hultberg

    Brute force: the application of effort of force instead of efficient, carefully planned and precisely directed methods. That sums up my approach to the sudden switch to remote teaching and learning. As it turns out, it can work. But 10 weeks of constant around the clock teaching and decision-making had taken its toll. Over the last few weeks I’ve tried to dissect my courses in an effort to determine what techniques were helpful and perhaps what I should change for the fall. My goal is to ensure that my next experience teaching a course with an online backbone is efficient, carefully planned, and hence less work.

    I have the following goals:

    • Set limits on my own availability
    • Make some assessment activities automatic
    • Use technology for more efficient feedback to students: audio, video, annotation
    • Encourage group work
    • Implement low-stakes assessment related to my lecture videos
      • Some form of conditional access in Moodle
    • Microsoft Teams for student group discussions
    A 7-minute video by Patrik Hultberg