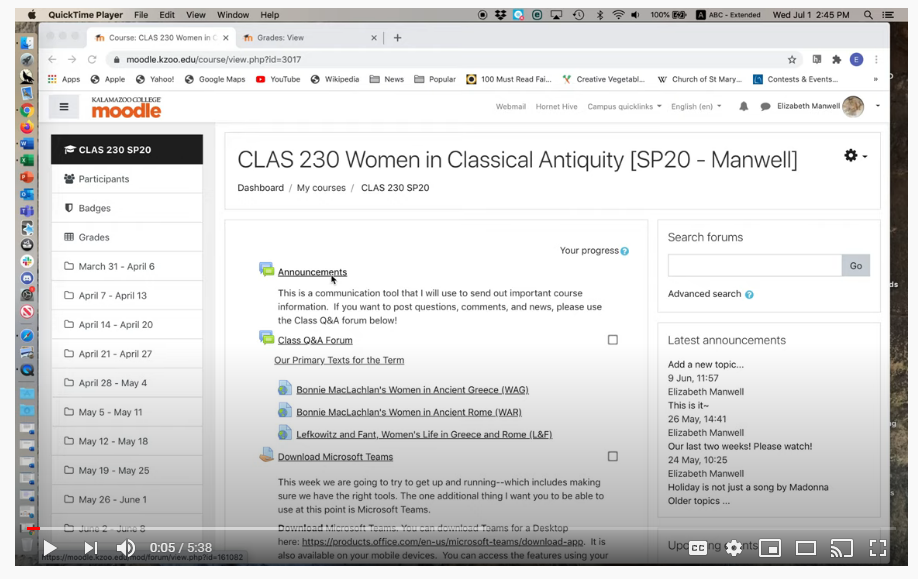
I used “feedback” in Moodle to create a quick quiz/assignment that I used to gauge reading comprehension of the “theoretical” piece we read in class each week. Giving feedback to students using it was the least elegant aspect, but it was otherwise a good and quick way to check their understanding of the main points.
#KTeachDev2020
Two assignments that take advantage of distance learning to make profound connections — Mark McDonald
Foreign correspondent and bureau chief for IHT, Knight Ridder, New York Times, etc. Author of the new PTSD novel, Off the X, Mark McDonald (K73) returned to Kalamazoo this winter and spring to teach two courses in Journalism.
Two interview-based assignments that I used in the Winter and Spring terms seemed particularly successful with the students, and I think they could work across a range of departments, subjects and courses at K. I first used them in the journalism and politics seminars that I taught at the University of Michigan.
Example One:
As part of a Reading the World/Genre class called “Media Literacy,” we read a snappy, timely new book by Bob Garfield, who co-hosts a weekend media/politics show that’s heard on NPR. (In the world of mainstream journalism, he’s kind of a minor celebrity.) We read and discussed a chapter or two each week and finished by the seventh week. I had called Bob earlier and he agreed to Zoom-speak with us in Week 8.
Each student sent in a couple questions beforehand, which I edited down to a dozen or so, and Bob joined us for 90 minutes one afternoon. With 30 students jammed onto Zoom, having a free-flowing, back-and-forth discussion was a little unwieldy, but not too bad. All the scripted questions got asked/answered, we had time for several impromptu ones, and Bob delivered a rousing outro that was both a challenge to the students and a call to civic action.
Most of the students were kind of stunned that we were actually talking to the person who wrote the book we had just read. They didn’t buy into all of his arguments and positions, to be sure, but that was an instructive part of the experience, too.
Now, I realize that any number of professors deploy guest lecturers when we’re on campus, sure, but online classes make Zoom appearances by luminaries and superstars all the easier now. Hey, they’re just sitting around at home, too. Aren’t they dying to talk to someone, especially student-fans at our hot little liberal-arts school? Zooming also precludes the need for a guests’ travel costs, sizable obligations of time, and honoraria. (Marin Heinritz freed up some ENGL money that allowed me to send some K-branded gifts to Garfield as a thank-you, and Debbie Thompson pulled the items for me. Sixty bucks, all in.)
Example Two:
I used another somewhat unusual assignment in both the RTW class and my Shared Passages seminar titled “Combat, Conflict and International News.”
In the sophomore seminar, each student was required to interview a working journalist, preferably someone with international news experience. (Diplomats, aid workers and combat veterans were OK, too.) I encouraged the students to think big. Google people. Give it a shot. Look on Facebook, Twitter, university and NGO websites, Instagram, whitepages.com. Cast a wide net, I told them. Aim high. Be resourceful.
When I debriefed them afterward, most students said they had been wholly intimidated by the assignment. They were sure they wouldn’t be able to identify anybody, or find their contact details, or get folks to agree to talk. “How do I interview someone? Do I record the thing, or take notes? How many questions? What does off-the-record mean? Is a conversation an interview? What happens if they bail on me? Why would they talk to ME?”
Were they stressed? Daunted? Uncertain? Maybe a little scared? A little angry? Yep, all of that.
I helped about half the students with names of people I know in the journalism business; the other half found interviewees entirely on their own. Nobody failed to find somebody, although several students did have to resort to Plans B, C or F. (Which was part of the assignment, too, of course. Welcome to the life of a working reporter.) Some students panicked a little, but they all persevered. In the end I think they quite surprised themselves — and were proud of what they saw as a real accomplishment.
And some of their “gets” were stunning. One sophomore found and interviewed the courtroom sketch artist assigned to the Guantánamo Bay prison tribunals. (She even got permission to use several original sketches of the detainees in her presentation; the sketches came with approval stickers from Defense Department censors.) Two students landed superstar writers from The New Yorker, and a dozen or so reached and interviewed New York Times and Washington Post reporters, including a handful of Pulitzer winners. Several interviewed combat photographers. One student got a long interview with Linda Greenhouse, now at Yale Law, perhaps the country’s foremost expert on the Supreme Court. Another found a female combat officer who’s a policy analyst at a big D.C. think tank. Another interviewed a Houston-based reporter who has been covering femicide in Mexico, an issue we examined in class. So many examples like these. Really remarkable.
Within the first two weeks of the seminars, each student also had selected a book from a list of 30 relevant titles that I provided. (One book per student, no overlaps. Most chose books on their own; a few needed a little guidance. They were to read the book throughout the term and do a substantial critical essay on it by Week 9.) Anyway, for their interview assignment, a dozen or so students tracked down the authors of their books. They were clearly thrilled when they found the writers freely exchanging thoughts and ideas with them — mere college students!
I left the scope and presentations of the interview projects up to each student — written Q-and-A transcription, recorded Zoom interview, PowerPoint, audio file with written text, whatever. One student did a manga-like presentation on Acrobat. One wrote an epic poem. Another made a short documentary film.
Predictably, perhaps, most students wanted to know beforehand exactly what I wanted, what questions to ask, how long the interview should be, how many pages of transcript, what format I preferred. I refused to answer these questions. The students were not comfortable with this AT ALL, and they gave me a good bit of heat about it. They complained that “You’re not being clear.” They wanted to succeed, of course, and not having specific metrics and parameters was new territory. Their stress was almost palpable. Still, I left them to their own devices — and they all succeeded. In splendid fashion.
The Bob Garfield appearance and the interview assignment showed the students that “unthinkable “things are indeed quite achievable. Also, feeling intimidated and uncertain needn’t be paralyzing. You’re 20 years old but you CAN operate and succeed on your own initiative in the wider world. (I suspect this kind of lesson is especially helpful for second-years who have yet to study abroad.) Famous authors, scholars, soldiers, journalists, civic leaders — they’re within your reach. They were 20 once, too.
To sum up, I think this kind of assignment could be useful in any number of courses at the College. And I will apologize in advance for what will likely sound like a rant, but we can easily and obliquely teach the students to think big and dream bigger by using unusual interview assignments or Zoom visits.
Like visits from working artists, musicians, dancers, theater/film folk. Historians, scientists, judges, journalists, engineers, novelists. Call up the U.S. poet laureate, or a former one. Try to land the head of design at Tesla, Ford or Shinola. Invite the winner of a Fields Medal to speak to a Math class. Get a Nobel laureate in economics like my friend Joe Stiglitz or Esther Duflo, who works in poverty alleviation. Zoom-interview an archeologist on site at a dig somewhere — Italy, China, Greece, Mexico.
Get the author of your class textbook to Zoom with you for an hour. We have supremely accomplished alumni in countless disciplines who would love to help out, too. Farmers and entrepreneurs. Interview a former soldier from the My Lai massacre, like the combat photographer who was there that day and blew the scandal open. (He’s 80 now and lives in Cleveland, by the way.) Call up the heads of Black Lives Matter, Planned Parenthood, the ACLU, the NRA. So many of these folks will happily and graciously talk to students or classes. We just have to ask.
The Simplest Way to Record Video Lectures up to 15 minutes: Microsoft Stream
Everybody at the College has access to a suite of Microsoft programs. Among them is a video sharing platform called Stream. The built-in capabilities of that program make it the easiest way I’ve found to record a video lecture that includes a picture-in-picture webcam video of you presenting the lecture. The one limitation to be aware of: the platform has a limit of 15 minutes for these kinds of recordings. That isn’t a problem in my view/ A prepared video lecture can get your message across in that time, and students report that longer video lectures are hard to digest. Below is a quick 5-minute video that shows the process from beginning to end.
Use Teams to record a video lecture
An important note: The steps below work in the Teams App on my machine running in Windows 10. We’ve come to realize that different operating systems have different features and behavior. If you have a Mac, Chromebook, or use the browser-based Teams site, please let everyone know how/if this works for you in the comments below. Thanks!
There are lots of solutions for recording video lectures that include your webcam image. Here’s one that doesn’t require any extra software. We’ll use the Microsoft programs Teams and Stream, both of which are available free to every member of the K community, to record a video lecture about recording video lectures!
The key things you’ll need to do:
- Select “Meet now” to start a call in your Team, but don’t invite any other participants. Please note that the “Meet Now” button has moved to the upper right corner of the Teams window.
- “Share screen” if you want to include PowerPoint or other content in the recording
- Record the call using the three dots menu …
- When you select stop recording, your recorded lecture will appear immediately at your MS Stream site. Even if you’ve never used Stream, you have an account already set up through the K College Microsoft suite of programs. Click here to learn more about Stream.
- Trim the beginning and end of the recording in Stream for a more polished final product.
- Copy the link from Stream to include in your Moodle site for students to access the recording.
Creating Breakout Groups in Teams with Channels — Kathryn Sederberg
Kathryn Sederberg (German Studies)
In this post, I share how I used channels in Microsoft Teams to create small groups similar to Zoom breakout rooms, in which students can meet to work on a task and the instructor can “drop in” and move between groups during synchronous class sessions.
In my classroom (the one with tables and chairs), the hour is usually spent alternating between small-group or pair activities and large-group follow-up. Language instructors want nearly 100% of the class time to be spent in the target language, and we want students to be using the language actively as much as possible. Students speak and listen to one another, or they write together, communicating about a topic and thinking about how to express themselves and make themselves understood. The smaller the group, the more speaking time for each student. After setting up an activity, I usually move around the classroom to help students, and turn on a dime when I hear a group across the room that maybe misunderstood the task, or thought I was out of earshot and just slipped back into English.
In March, when I thought about how to adapt my spring courses (German 201 and German 470) to an online format, creating small groups for synchronous video meetings was one of my biggest priorities. For those of us who had experience with Zoom, the lack of a breakout room function in Teams was a problem. In this post, I share how I used channels in Microsoft Teams to create small groups similar to Zoom breakout rooms, in which students can meet to work on a task and the instructor can “drop in” and move between groups during synchronous class sessions.
Although there were of course mishaps along the way, the students and I got used to the rhythm of moving between large and small group work and in the end it worked fairly well. In my course feedback, students responded positively to this setup: “we did a lot of partner/group work which was helpful in improving my collaborative thinking skills”; “the small groups were useful in practicing speaking and writing in a smaller environment”; “The balance between large class meetings, small group meetings, and individual work was pretty good.” I can imagine how using small groups in Teams would be useful for many kinds of group or pair assignments in other disciplines.
Using Channels for Small Groups
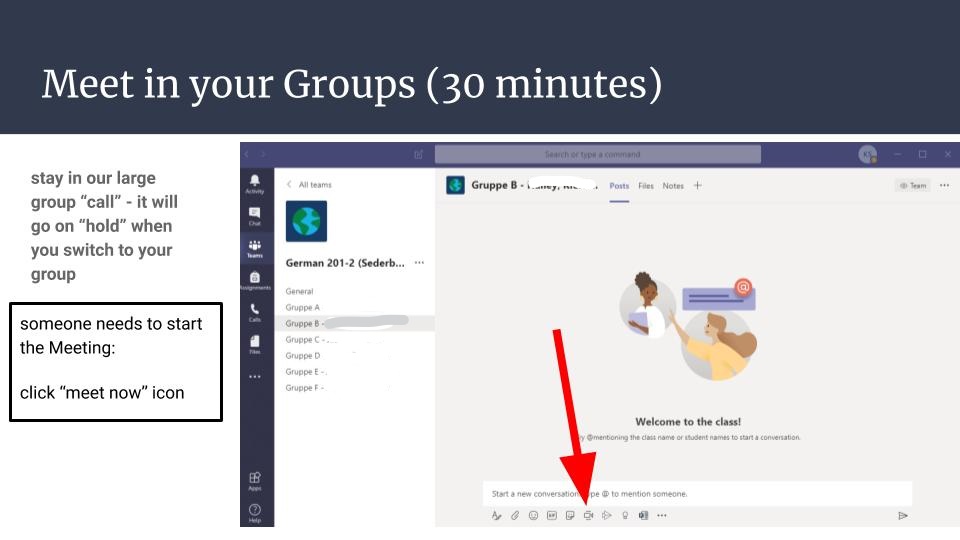
Microsoft Teams allows users to create channels within their teams, and from within a channel you can easily click on the “Meet now” button in the bottom toolbar to start a group call (with or without video). You can have more than one call going on simultaneously in a team, and as an instructor you can see who is meeting in each call, the duration of the call, and you can join and leave these calls. Students can also record their meetings. There is a chat associated with each channel and with each call/meeting.
In a typical class session, I would begin class by starting a video call in the “General” team channel. I would make small talk with students, take attendance, and do a warm-up activity and perhaps some review. Then at some point I give students a task to work on in small groups. For German 201, I created six small groups with 3 students each, and in German 470 I created groups of 3-5 students. While students are working in their small groups, I could leave the general call on “hold” and toggle over to “visit” the small groups by clicking on the channel names on the left sidebar and on “join meeting” from each channel chat. In this way, I could usually visit all groups during the hour. At the end of the scheduled group work time, students meet back up in the general meeting, which was left “on hold.”
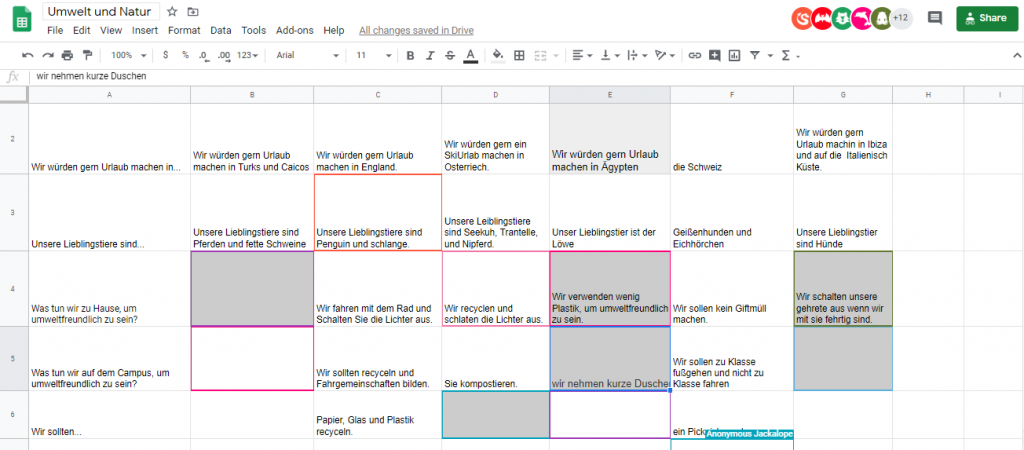
I found that it is important to create a clear and specific task (“Work through this set of 5 questions”) with a time limit (“Meet back in the main group in 30 minutes, at 10:30”), and to somehow hold students accountable for the work (“Designate one person to take notes”). I also found that the combination of Teams for small group video calls and collaborative, real-time documents like Google Docs or Google Sheets helped to hold students accountable for the work and allowed me to watch their progress in real time and check in with the students who needed assistance. For example, my intermediate German students asked each other questions related to our topic “nature and the environment,” and recorded their answers in a Google Sheet. I could see immediately how far the groups were in the activity, who needed help, and what grammar and vocabulary I needed to review with the whole class. In my upper-level seminar, to provide another example, students worked together in small groups on a Google Doc to summarize an article they had read, to write discussion questions based on a text, or to write a film review.
How to set up channels in your team:
- Open your class team by clicking on the “Teams” icon on the left sidebar and selecting your class.
- Next to the name of the team, click on the “…” button and then “Add channel.” Give your channel a name that includes the names of the students, for example: “Group 1 – Max, Ben, Sarah.” This enables students to easily see which group they are in. Leave the default Privacy setting (Standard – Accessible to everyone). Important: click the box that says “Automatically show this channel in everyone’s channel list.”
- Continue to add channels for all groups following the instructions above
- You may also click on the “…” icon next to your Team name, and then on “Manage Team” / “Channels”. This allows you to select/unselect the boxes for “Show for me” and “Show for Members” and to delete channels
For my 400-level German class, I set up small groups that I changed every two weeks, mixing the students randomly. I found that students wanted a more stable group so they could get to know their small group members and 2 weeks was about right, because they also wanted variety and to get to work with different students in the class. In my 200-level German class, I changed the groups every week because they were smaller and the groups met more frequently. When you change up groups, you have the option to delete the old channels and thus their chat/call history (what I did), or you could also just re-title the channels with the names of new group members.
I also learned the hard way that if you click on “hide” under the channel options, the channel only disappears from view on your team, not for all members. I had a student screen share and was horrified that they had a list of 10+ different channels on the left sidebar – a confusing mess of old channels I thought I had “hidden” and thus cleaned up. You can manage channels that are shown by clicking “Manage team” / “Channels.”
Summary and Tips:
- Use channels in Microsoft Teams to create small groups.
- Students can video call in small groups and the instructor may join and leave calls
- You can have multiple video calls (meetings) going on at the same time within a team. You can leave the main (general) call “on hold” as a place for students to return to after their group meets
- Be clear about how long students should meet in their group, and assign someone to keep an eye on the clock
- Ask students how often they want to switch up small groups. You want to allow students to get to know their small groups, but also work with different students in class.
- Use collaborative documents (Google Docs, Sheets) to see students work together in real-time and give feedback.
- Teams allows you to view video for up to 9 users. If you create groups larger than 8, some students will be able to “hide.”
I want to end this post with a round of applause for Josh Moon and a huge thanks for all his help in supporting faculty over the past few months. Danke, Josh!
Five Things: What students are telling us about online courses at K — Rick Barth
We’ve had one term of practice with online learning at K College. The lessons learned will be needed right away as we plan for a future of hybrid course design and delivery that we hope will be robust in the face of uncertain public health environment in this time of Covid-19. Throughout the spring quarter, we heard feedback from students about what was working for them. Much of their feedback fits into five big categories:
- Social Presence in a time of Physical Distancing
- Frequent Assessment with Rapid, Detailed, Personal Feedback
- Multiple instructional modes
- Transparent and frequently-repeated explanation of course structure and requirements
- Explicit attention to the new ways of learning students need to develop in order to achieve learning at a distance
Not surprisingly, the things that worked best for students are in many cases consistent with and predicted by work in the pedagogy literature. Here we weave together summaries of student feedback with a piece by Michelle Miller: “Online Learning: Does it Work?”
1. Social Presence:
Throughout the spring term, we heard feedback from faculty about their sense of uncertainty in the absence of in-person face-to-face feedback from students. At the same time, students who reported positive experiences in their spring online courses comment again and again about instructors who found ways to create a sense of community and connection despite the distance learning format.
In her 2017 chapter “Online Learning: Does it Work?”, Michelle Miller writes:
Social distance is the flip side of the “social presence” concept first
articulated in the early days of telecommunications. It has to do
with the exchange of social cues and the feeling that one is authentically interacting with another person in the virtual environment. Creating social presence is another thing that online instructors need to pay special attention to, for example by encouraging students to offer personal information, eliciting supportive communications between students, and using communication tools that transmit facial expressions and vocal tone. Going the extra mile to do this doesn’t just make the class more pleasant, but is also an important predictor of success in the course.Miller, M. D. (2017). Chapter 2: Online learning: Does it work? In Minds online: teaching effectively with technology. Cambridge, MA: Harvard University Press
The social feedback instructors get from students is also radically
altered in an online environment. In a traditional classroom setting,
students’ faces give you an instant read on confusion, disengagement, and other important problems. Students stop by before or after class to clear up muddy points or talk in-depth about topics that caught their interest, and the give-and-take of an interactive lecture gives you a good grasp of students’ level of understanding, at least for the ones who speak up. Online, these interactions are usually heavily time-delayed and mediated by text, particularly e-mail and discussion posts — two communication formats that have a well-known propensity to misrepresent emotional tone. To compensate, online instructors need to make formal inquiries to students about how the class is going, as well as keep a close eye on data such as frequency of log-in, late assignments, and assessment scores so that they can form an accurate picture of how students are faring.
2. Frequent, Rapid, Informative Feedback
Students who reported the best experiences with online courses at K often singled out their appreciation of prompt, frequent, detailed and personal feedback on their work products. They often call out as a challenge those courses in which work that was graded as simply “credit” or “complete” without thoughtful formative feedback. In a format that brings challenges in traditional social connection, students found it very powerful to interact with their instructors through assessment products. Quizzes, short written pieces, class discussion forum posts, as well as longer more integrative work. As we put thought into the design of our fall courses, it will help instructors and students to develop assessment tools that allow for this deep engagement. For this to work, the balance of instructor time likely shifts from activities traditionally associated with “in class” to an intentional workflow of managing frequent, rapid, informative feedback. In addition to written feedback, some instructors at K this spring found found that Moodle’s audio recording instructor feedback tool lightened the burden of providing detailed feedback while simultaneously providing a socially present alternative mode of interaction with students.
Miller writes:
This traditional “best practice” is widely cited as one of the things
M. D. (2017). Chapter 2: Online learning: Does it work? In Minds online: teaching effectively with technology. Cambridge, MA: Harvard University Press
instructors should spend as much time and thought on as possible.
Teaching experts Eric Mazur and Carl Wieman have been passionate advocates of providing a more dynamic, feedback— rich experience in traditional lecture classes. Similarly, rapid feedback is a key feature of the best online learning experiences. There are myriad ways to accomplish this online, including peer feedback, auto-graded quizzes, and branching lessons that present varying content based on student input.
3. Multiple Modes of Instruction
Students gave feedback that was, widely varied and on the surface contradictory: “Readings were perfect”, “impossible amount of reading”, “Loved asynchronous video lectures”, “Video Lectures were the worst”, “Loved synchronous class meetings”, “Synchronous classes were awful”. A more careful reading of this feedback suggests to us that students found success with many modes of instruction, but with some caveats:
- 75 minutes isn’t what it used to be: Whether live or recorded, shorter (up to say 20 minutes) lectures were much more likely to be reported as helpful to students’ learning than attempts to “fill” the traditional class meeting period.
- Variety was greatly appreciated: detailed instructor emails in a course structure containing other forms of interaction were highly appreciated. As the only form of interaction, students frequently reported with vehemence about the unsuitability of a “course by email”.
Online courses can be designed with an emphasis on alternating text with other forms of delivery, such as animated narration or Skype conversations, but it is difficult to get around the need for a great deal of written communication. This contrasts with the typical face-to-face course in which lecture, audiovisual demonstrations, and spoken discussion are a major part of the learning activities.
M. D. (2017). Chapter 2: Online learning: Does it work? In Minds online: teaching effectively with technology. Cambridge, MA: Harvard University Press
Students who aren’t strong readers, or who just prefer non-text
modalities, are at particular risk of falling behind in a text-heavy
environment. Unfortunately, we don’t have many solutions for these
less-proficient readers. Minding the reading level of material, keeping it to the level of a newspaper or lower, is one basic strategy.
When using synchronous, fast-paced activities like real-time chatting, it’s also important to weigh any potential benefits against
potential difficulties for slower readers. Building in lots of those
aforementioned alternate forms— narration, audio, and video— can
also give a boost to less-proficient readers.
4. Transparency about Course Structure and Requirements
When students gave negative feedback about their experiences with online courses, it was often in the form of comments about not have a clear idea about what they were meant to be doing and when they were meant to be doing it. Frequent assignment with rapid feedback is only as effective as the students understanding of the details of the assignments.
This factor might fade as more students get experience with online
M. D. (2017). Chapter 2: Online learning: Does it work? In Minds online: teaching effectively with technology. Cambridge, MA: Harvard University Press
coursework and as online-course designers begin to converge on
commonly accepted conventions for course structure. In the meantime, though, students often come to online coursework with a less developed sense of how things work than they would for a traditional course. Traditional courses superficially resemble high school classes, in that they are organized around set times and places for meeting, textbooks, and schedules of deadlines— so even students with little or no college experience can fall back on this familiar script to figure out what to do next. Just showing up for class can assure these less-experienced students that they will probably get by. But how do you “just show up” for an online class? In an online class (or the online parts of a blended or combination online/traditional class), it may not be clear where to start, how to spend one’s study time, or when the work is due. Good design, of course, offsets the problem of orienting students to the layout of the assignments— but even in a well- designed online course, students as well as teachers have to work harder to establish a basic understanding of how the course will work.
5. Help students explicitly develop the new learning approaches they’ll need for online courses.
A number of students who gave positive feedback about their experience in online courses at K in the spring reported a growth experience in their awareness of their own learning processes: The shift to online courses was difficult in the beginning and became more manageable as the students began to examine their own role as independent learners in environments that offered much less structure and many more distracting features.
Miller has a very thoughtful account of this:
More so than in the traditional classroom, students can seriously underestimate how much time and effort is required to succeed in online learning. Part of this problem may have to do with the much- vaunted “flexibility” of online coursework.
If the idea is that online learning fits in between family time, paid
work, travel, child care, and everything else in life, it likely ends up
an afterthought tacked on after all those other life activities are
addressed. And as we all know, exhausted, distracted, time- pressed students are unlikely to achieve stellar intellectual gains in any instructional format. Some experts argue that online learning’s tendency to become a “third shift”— i.e., something tackled after work and family duties are done— places a particular burden on female students, given their greater responsibility, on average, for the “second shift” of family work. Furthermore, in face-to-face teaching, you can ensure that some bare minimum of time is devoted to classwork (by policing attendance), and you can schedule classes when students are likely to be fresh (i.e., not in the middle of the night).M. D. (2017). Chapter 2: Online learning: Does it work? In Minds online: teaching effectively with technology. Cambridge, MA: Harvard University Press
Neither of these basic strategies for ensuring maximal engagement
is easy to do online.Like many other quality issues, the third-shift problem can be addressed through forethought and savvy design choices. One good place to start is with a heavy dose of socialization at the beginning of the course about your expectations for student time commitment. Simply exhorting students that they will have to work hard and put in time has limited impact, but at least you can get your expectations out into the open early. Following through on your stated expectations, by having some small-stakes work due early in the semester, is another good practice for getting students into the right mindset.Beyond laying out your expectations and following through on them,
you can consider scheduling some synchronous-style work if you are concerned that students are just squeezing in little bits of work at odd hours. This approach has costs (such as potentially disadvantaging slower readers, as mentioned previously) and may be perceived as user-unfriendly by students, but it’s a clear way to exert more control over the pacing and timing of work.
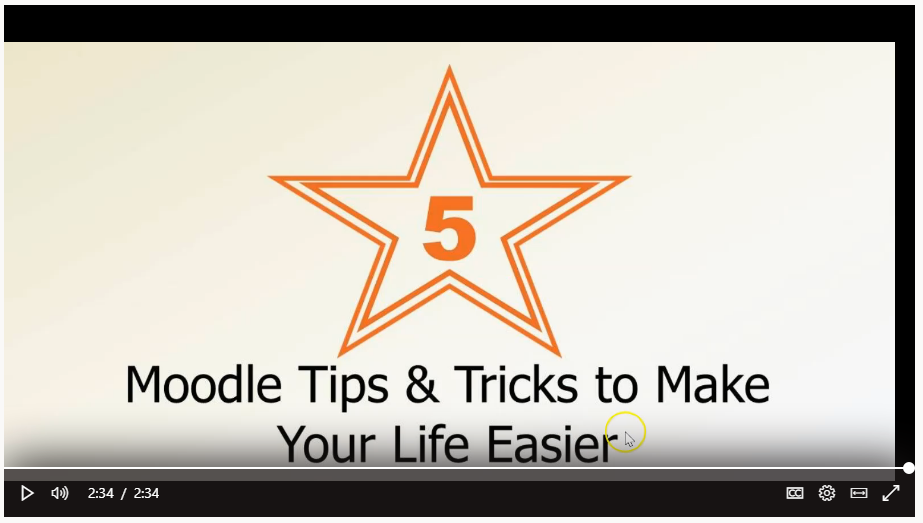
Five Things: Moodle tips and tricks — Josh Moon
- Change activity dates in one place with The “Dates” Report
- Letting Students Upload Directly to a Folder
- Check Forum Posts in Student Profiles
- “Move Right” and “Move Left” for visual organization
- A little HTML can go a long way
This Video is posted at Stream. Click here to learn more about Stream.
Five Things: Make a Personal Connection with Video — Rick Barth
As K College instructors, we’re really good at making a personal connection with our students face to face. In the social distancing world, our contact with students involves a lot more video. Here are five things that will help with making better personal connection with students and colleagues through video:
- Get the right angle
- Get the right light
- Upgrade your microphone
- Practice!
- Keep in mind the tech challenge of video calling
- Get the angle right: We record a lot of our video with laptop computers and tablets. Most of the time those devices live on our lap, desk or table. With that placement, the built-in webcams will show more of our nostrils than of our eyes. And nostrils are the windows to the soul? When you’re using your device for video, it needs a different placement than for other tasks. Find a box or a pile of books and get the camera up to eye level!
- Get the light right: Images need light, and the more the better, right? No. The cameras in our devices are designed to automatically adjust so that on average the light in the scene is at a pleasing level. If the entire scene is very dark, the camera’s work to compensate will introduce a lot of snow-like “noise” in the image. Worse yet, if you have a lot of light in the scene but the light is behind you, the camera will make your face almost invisibly dark to average out all that backlight. You want lots of soft light bathing your face. That might mean that you use your device for video in a different location, or turned in a different direction than when you’re doing other work. Here’s a link to an excellent 10 minute video on lighting.
- Upgrade your Microphone: Weirdly, the most important feature of a video is the audio. The picture is a bonus, but the sound is where the connection gets made. All of our devices have built-in microphones. But microphones work differently than cameras so the correct placement of our devices to get the picture right puts the microphone too far from you, the subject, and too close to the device. The result is that the audio will pick up too much of the room echo, too much ambient noise, and too much sound from your device like mouse clicks and keyboard sounds. If you upgrade one piece of equipment for your videos, upgrade you microphone! A simple, effective and cheap way to do that is to use wired earbuds with built-in microphone, like these.
- Practice! All the things that work for you in the face-to-face classroom were developed over time with lots of practice. Contrast that with the teaching work we’re trying to do now with video: we haven’t had the advantage of years of practice. That calls for some intense and intentional work now, watching and listening to your own recordings. The things your see will help you make changes in your delivery that make for better personal connection in your videos. Here’s a link to an excellent video filled with on-camera tricks and advice.
- Video calls stretch your system’s capacity: We can make our video calls more effective by keeping in mind that live video conferencing is one of the most computationally intensive tasks we require of our devices. A good internet connection is of course important, you can measure your internet speed with your browser. A lot of the freezing, jerking, breaking-up we encounter is not from slow internet, but from overtaxed devices. To lighten the burden:
- wear earphones to minimize your device’s anti-echo burden
- close other apps during your video call
- restart your computer often
Stay tuned for more Five Things resources:
*How to get the webcam picture-in-picture effect for your recorded video lectures
*Using Microsoft Stream to upload, store and publish your videos for students to access.

